
You are using an out of date browser. It may not display this or other websites correctly.
You should upgrade or use an alternative browser.
You should upgrade or use an alternative browser.
Jason's Coyote Powered RCR40 Downunder
- Thread starter jferraro
- Start date
Thanks for the comments guys. If anyone can suggest RCR wheel speed sensor fitment details in the link below it would be appreciated.
http://www.gt40s.com/forum/rcr-foru...ction-control-wheel-sensor-fitment-rcr40.html
I would like to fit traction control to the car.
http://www.gt40s.com/forum/rcr-foru...ction-control-wheel-sensor-fitment-rcr40.html
I would like to fit traction control to the car.
Terry Oxandale
Skinny Man
Excellent work!
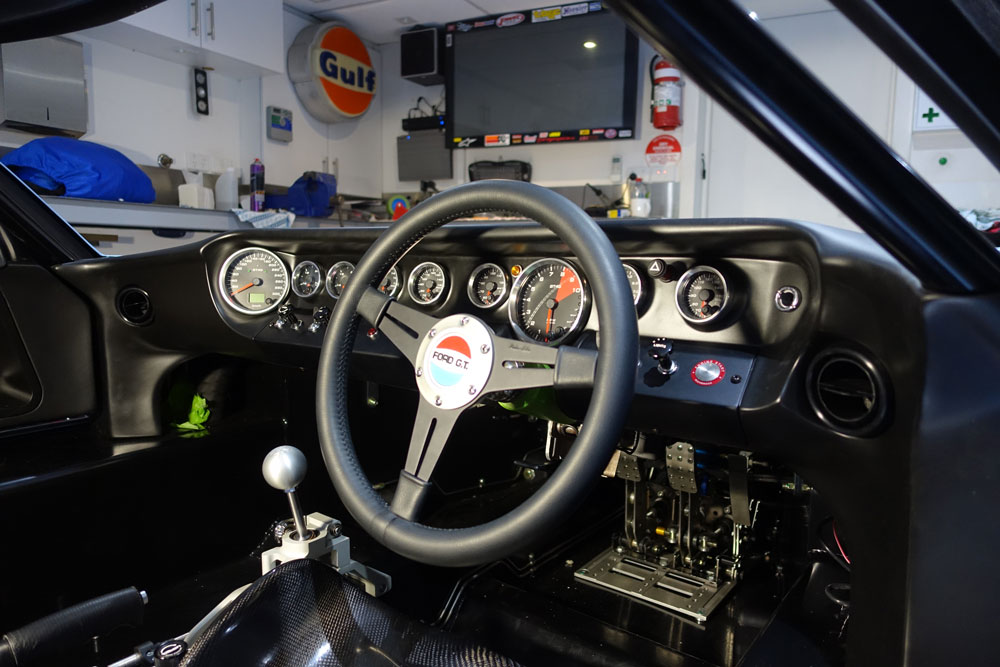
Dash
Work to position the switches on the dash has gone well. I really did not want to scratch the anodised alloy plates that I made to hold the switches. In the end it all worked out well. Now they are all ready to be wired up!
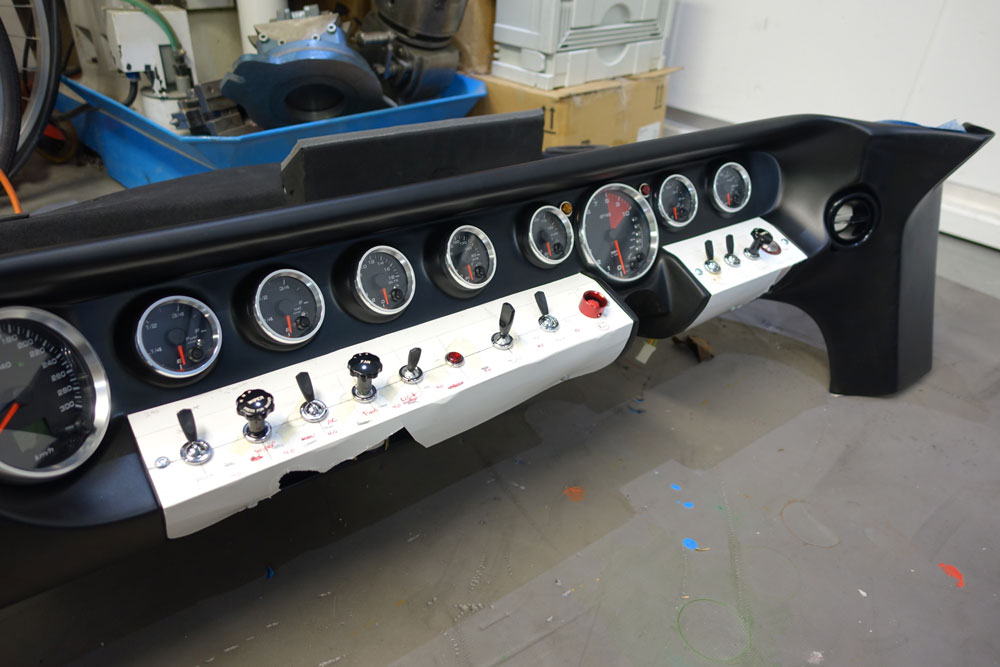
Making a paper pattern to position the switches helped heaps.
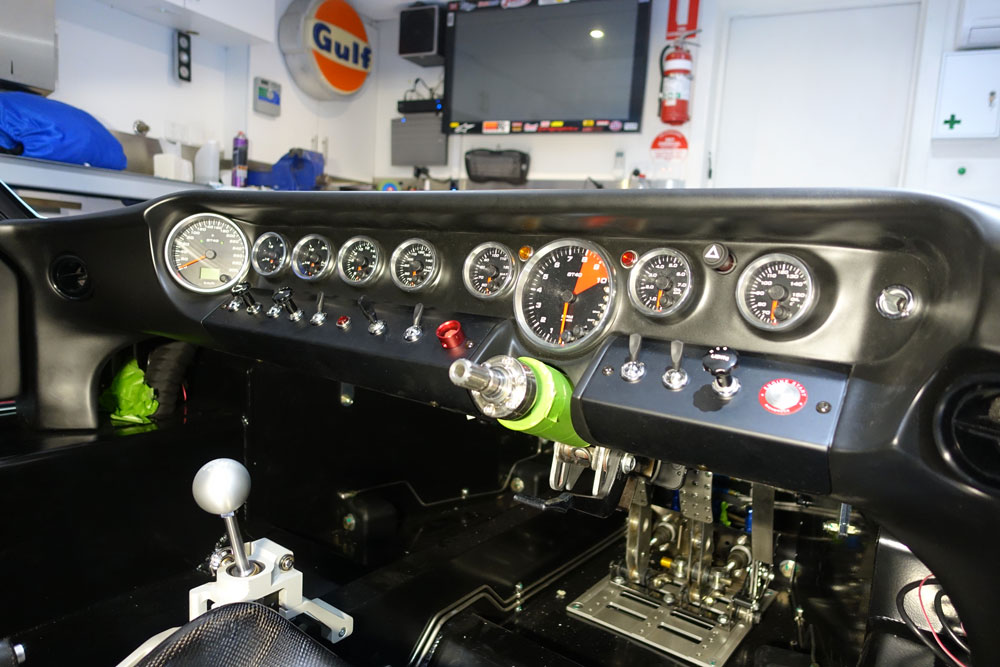
All came out OK in the end.
Please remember if anyone has any idea on traction control sensor placement for the car please speak up. Thanks.
Work to position the switches on the dash has gone well. I really did not want to scratch the anodised alloy plates that I made to hold the switches. In the end it all worked out well. Now they are all ready to be wired up!
Making a paper pattern to position the switches helped heaps.
All came out OK in the end.
Please remember if anyone has any idea on traction control sensor placement for the car please speak up. Thanks.
How to label the switches, that is a bloody good question! I am not sure about the permanency of etching labels, and I'm also not sure about the look of a dymo label!
For now they will be blank until I lockdown the switch use 100%
Sorry I'm not much help on this one.
For now they will be blank until I lockdown the switch use 100%
Sorry I'm not much help on this one.
Ian Anderson
Lifetime Supporter
I used these
Self Adhesive Switch Legend Sheet - Car Builder Solutions - Kit Car Parts and Accessories
Not particularly good on leather - would be great on aluminium
Ian
Self Adhesive Switch Legend Sheet - Car Builder Solutions - Kit Car Parts and Accessories
Not particularly good on leather - would be great on aluminium
Ian
These guys seemed very helpful when I spoke to them. I think it was at an Electrical expo in Brisbane, now I think of it...
Laser Engraving - Outsource1
Laser Engraving - Outsource1
Start Your ... Electrics!
Its been a while since the last post but I have been busy.
Time has come to start the electrical systems and wiring. As I currently work for the largest electrical connectivity company in the world (TE Connectivity) I will probably struggle with this part of the build! The honest truth is making a real motorsport harness is a real art and VERY expensive. I will be simply building a sound harness using correct crimping tools with select quality components to keep the cost and complexity down.
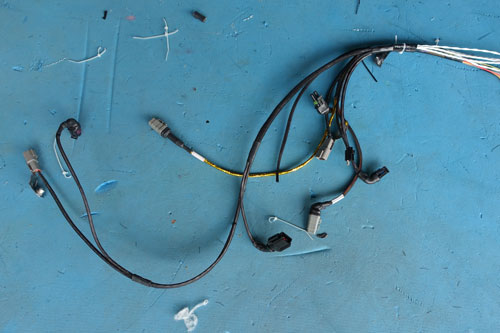
I started at the rear of the car on the transaxle harness. I have opted to use military specification shielded cable for all the sensors as its light, and compact as there are a few sensors on the car. For all connectors that are not defined by a specific device connector I have opted to use Deutsch connectors. Although these are not cheap they are very good and easy to work with. I began designing the harness utilising multi pin Deutsch circular connectors to aid in removal of the engine, front and rear body work, dash etc. No harness will be built in a manner that its locked into the chassis. Also there will be no separate harnesses, all wiring will be integrated in a loom, not added a part at a time. A lot of the cables are to big a gauge for the motorsport Deutsch range so I am sticking to the HD, DT, DTM and DTP range.

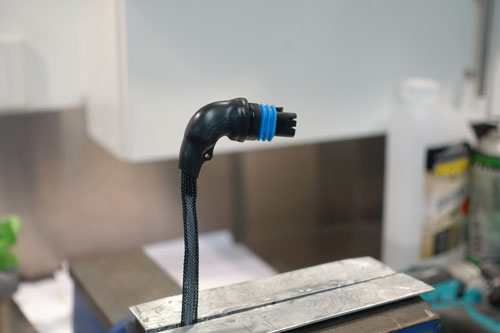
I also opted to begin using proper right angle and straight connector heat shrink boots where possible like below. It really makes the harness a little more durable. No tape and nylon braiding or nylon corrugated (unslit) tube in areas of extreme flex was also used.
Fitting up the rear lights was a step I was looking forward to for some time. I also added a center mounted LED light that car be configured as a third brake light, reversing light or rain light.
As I am making up all the looms from scratch so I invested in a large amount of different colour and gauge super thin heat resistant and ultra flexible (120 degrees Celsius) AESSXf wire. Its great stuff and its nice to have all the cable you want at hand with enough colour combinations to do each circuit in a colour coded manner.
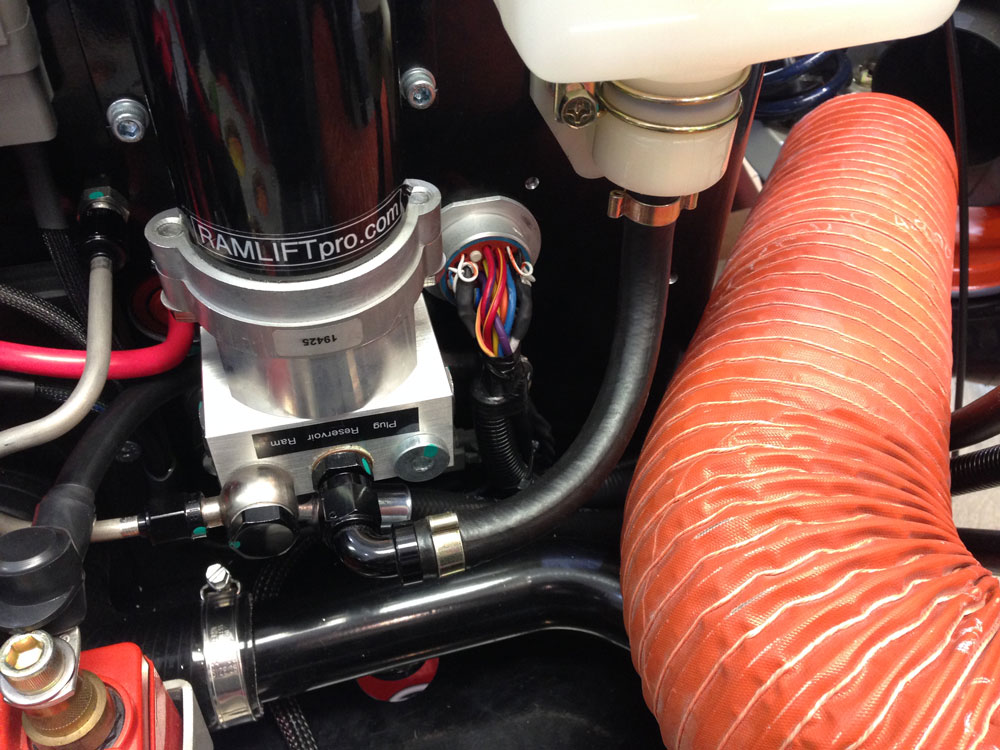
All the fans and other systems at the front were wired to one main Deutsch HD34 connector, I will not fit the boot until its electrically tested. Below you can see the lift pump for the lift kit.
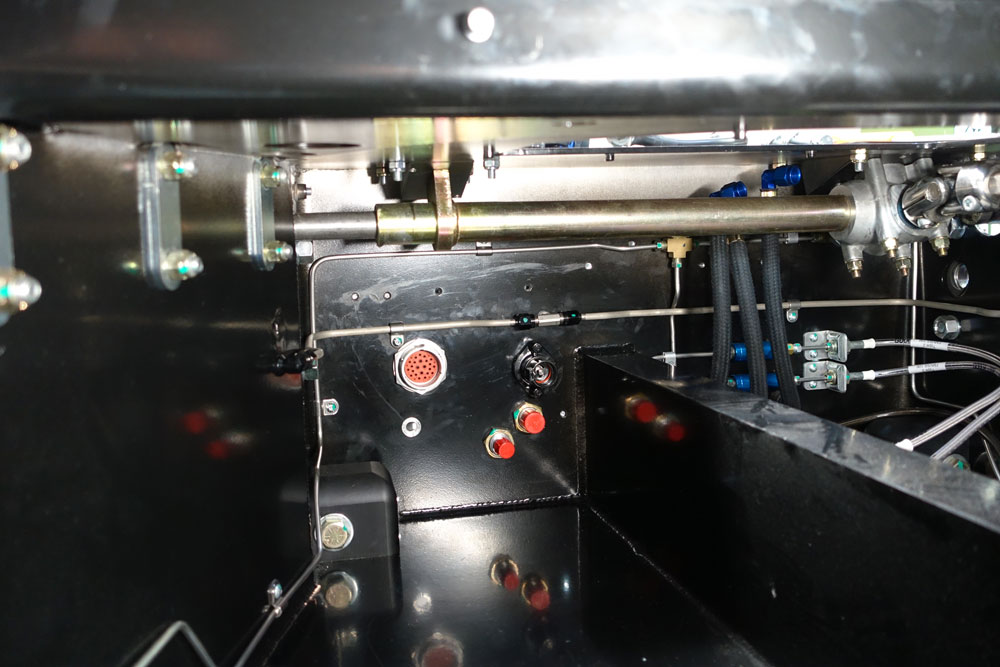
On the inside of the car one can see the connector face, I want the main fuse and relay board in the foot well to be easily removed to assist with making it and any repairs. There is one large single pole (black) DTHD connector (100A) for the supply to the board. The other fittings in the image below are the A/C lines (not connected yet).
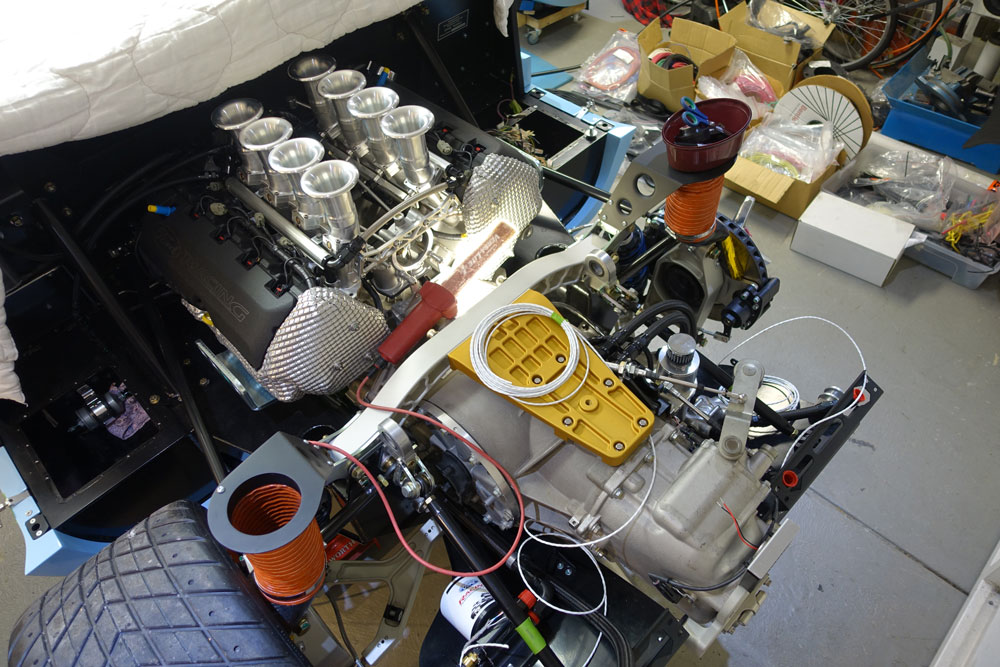
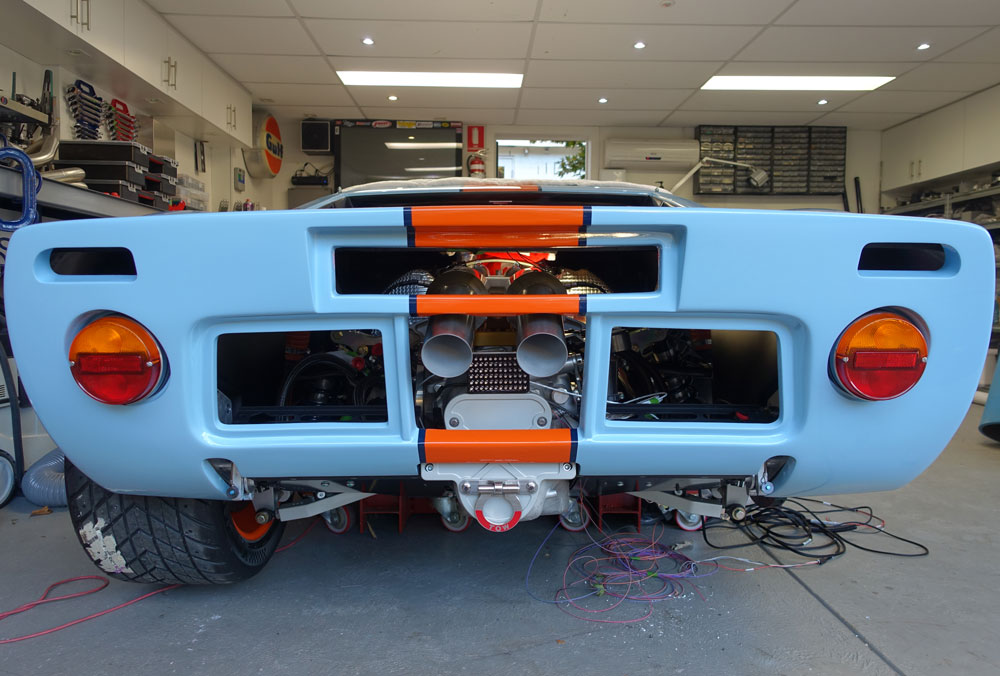
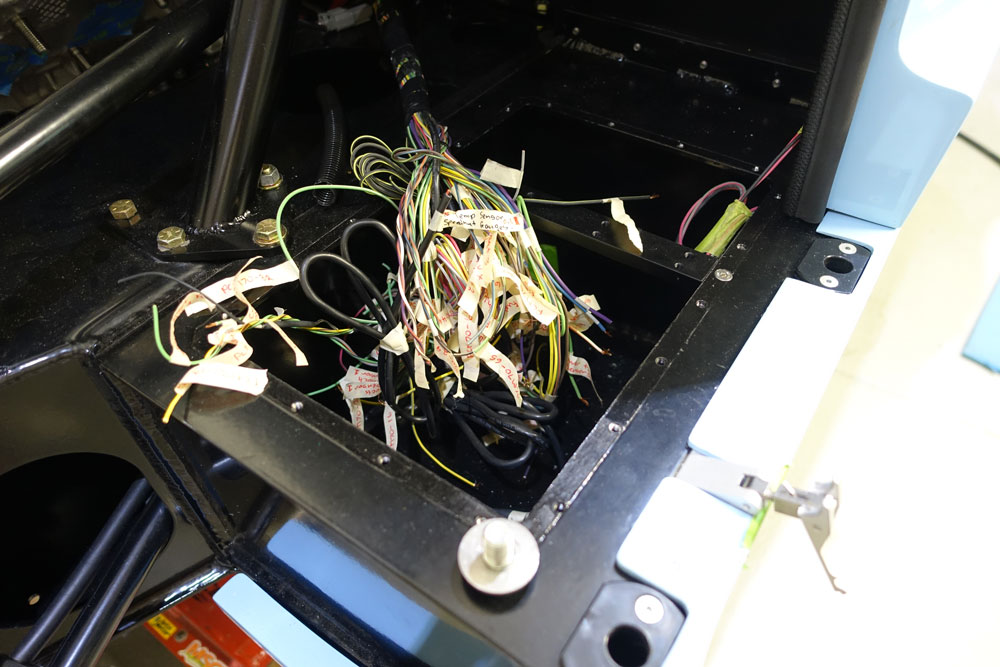
All the wiring is going well, but I'm avoiding the engine wiring, I don't know why (see the image below!).
Its been a while since the last post but I have been busy.
Time has come to start the electrical systems and wiring. As I currently work for the largest electrical connectivity company in the world (TE Connectivity) I will probably struggle with this part of the build! The honest truth is making a real motorsport harness is a real art and VERY expensive. I will be simply building a sound harness using correct crimping tools with select quality components to keep the cost and complexity down.
I started at the rear of the car on the transaxle harness. I have opted to use military specification shielded cable for all the sensors as its light, and compact as there are a few sensors on the car. For all connectors that are not defined by a specific device connector I have opted to use Deutsch connectors. Although these are not cheap they are very good and easy to work with. I began designing the harness utilising multi pin Deutsch circular connectors to aid in removal of the engine, front and rear body work, dash etc. No harness will be built in a manner that its locked into the chassis. Also there will be no separate harnesses, all wiring will be integrated in a loom, not added a part at a time. A lot of the cables are to big a gauge for the motorsport Deutsch range so I am sticking to the HD, DT, DTM and DTP range.
I also opted to begin using proper right angle and straight connector heat shrink boots where possible like below. It really makes the harness a little more durable. No tape and nylon braiding or nylon corrugated (unslit) tube in areas of extreme flex was also used.
Fitting up the rear lights was a step I was looking forward to for some time. I also added a center mounted LED light that car be configured as a third brake light, reversing light or rain light.
As I am making up all the looms from scratch so I invested in a large amount of different colour and gauge super thin heat resistant and ultra flexible (120 degrees Celsius) AESSXf wire. Its great stuff and its nice to have all the cable you want at hand with enough colour combinations to do each circuit in a colour coded manner.
All the fans and other systems at the front were wired to one main Deutsch HD34 connector, I will not fit the boot until its electrically tested. Below you can see the lift pump for the lift kit.
On the inside of the car one can see the connector face, I want the main fuse and relay board in the foot well to be easily removed to assist with making it and any repairs. There is one large single pole (black) DTHD connector (100A) for the supply to the board. The other fittings in the image below are the A/C lines (not connected yet).
All the wiring is going well, but I'm avoiding the engine wiring, I don't know why (see the image below!).
Rear Clip Heat Shields
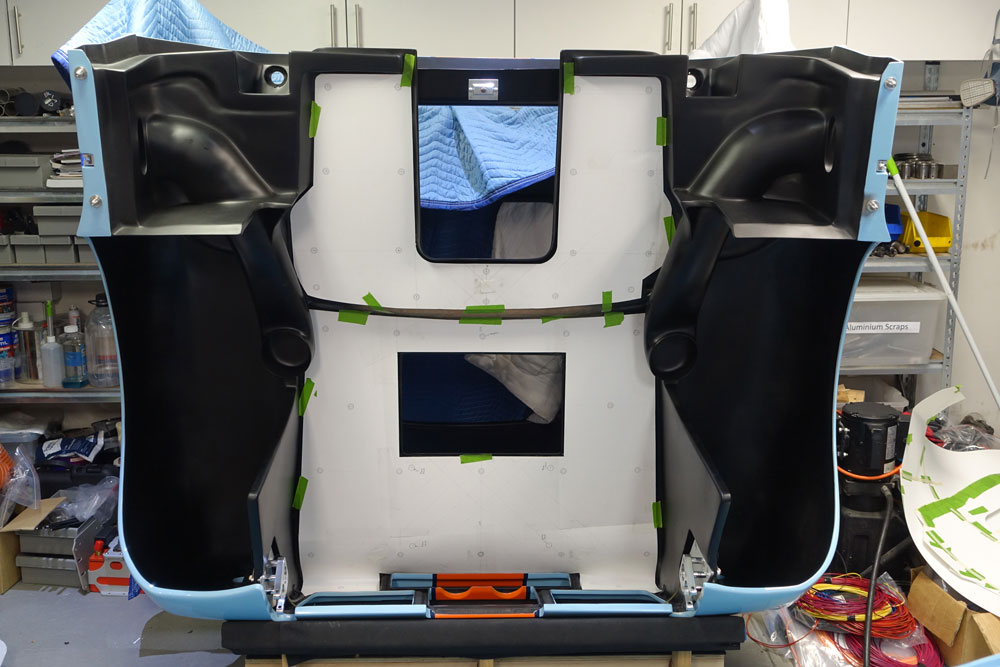
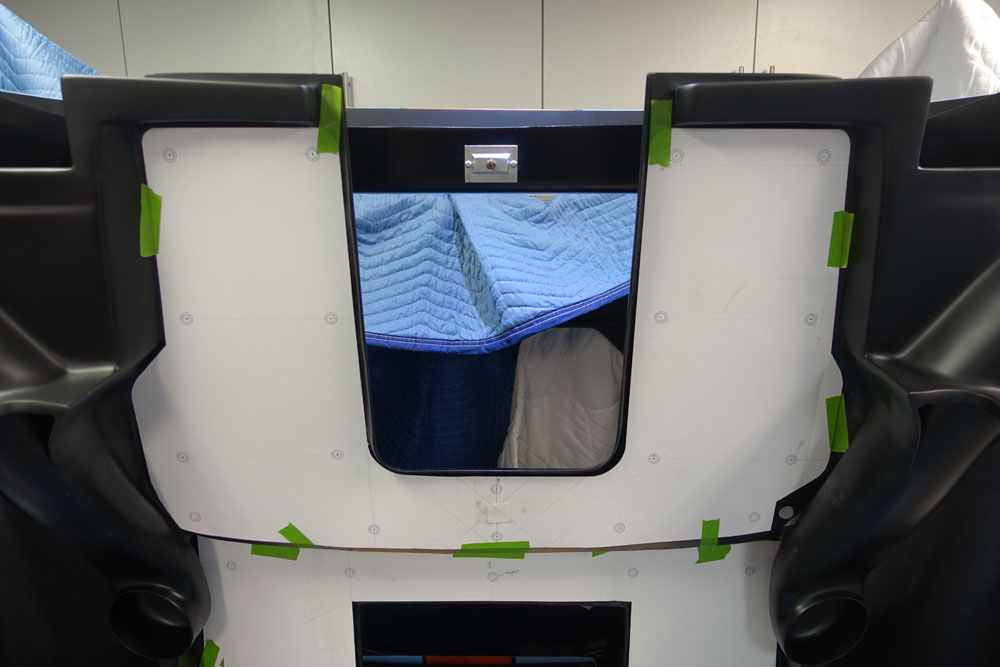
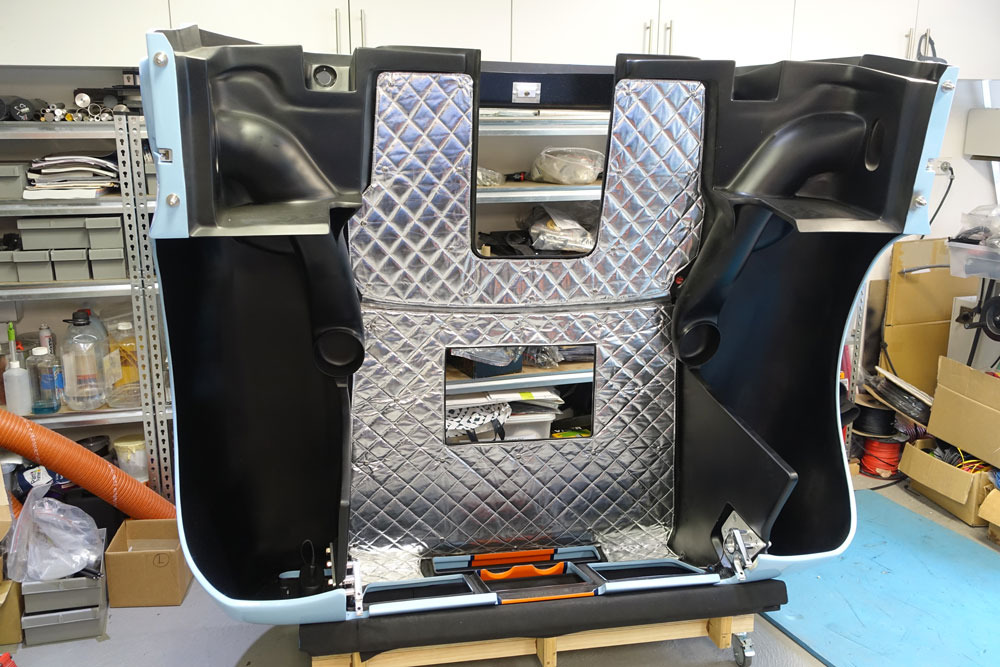
The protection of the rear clip has been something I wanted to tackle in a different way to many other builds. I really wanted a black material but for obvious heat reflection reasons it was not available. I decided to use a high temperature resistant fiberglass cloth sewn to a high temperature metalised cloth. Its used in high temperature applications (turbo wrapping etc.) and is very light. I always wanted a quilted pattern so I made some templates of what I wanted as per below.
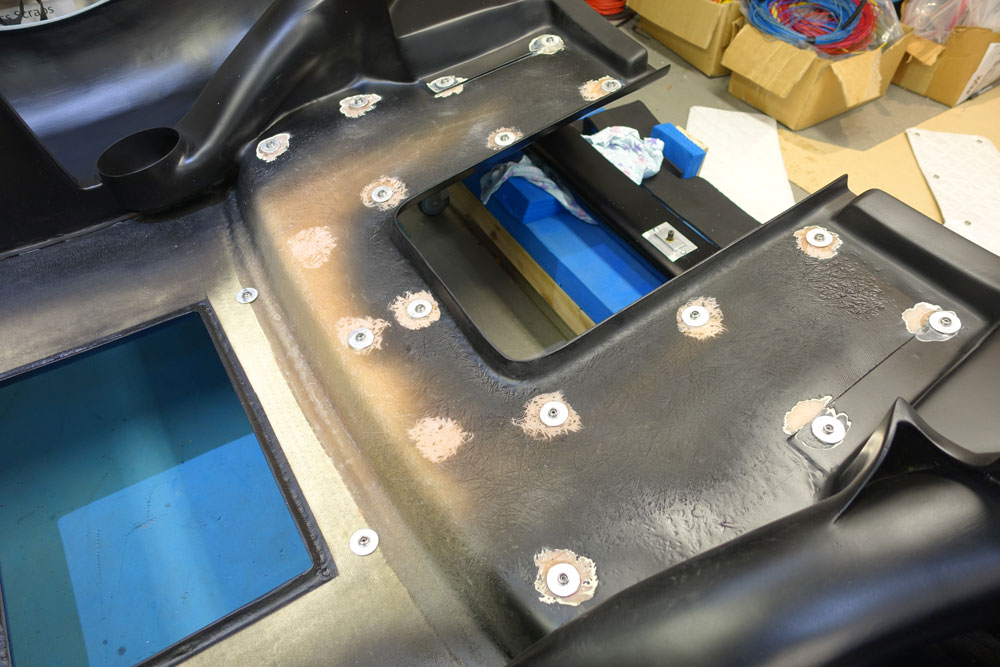
I also did not want to glue the material to the car. I am worried it will fail and drop on the engine so I decided to fasten it at the points below.
This was done with stainless steel press studs. They were attached to an aluminium disc.
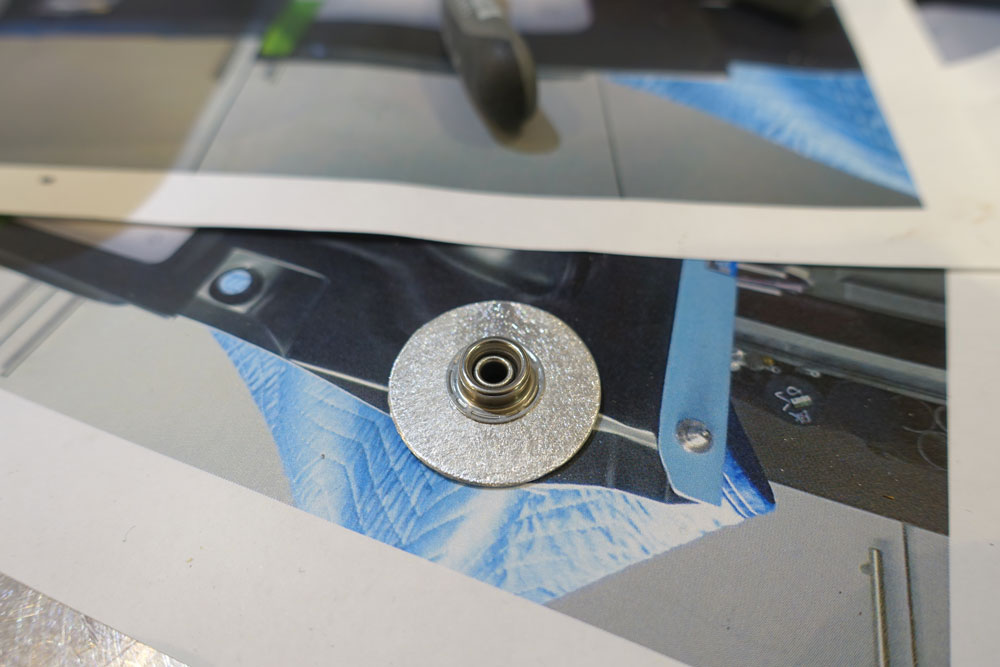
These were positioned under the clip and bonded using Plexus adhesive. Under the blue painted surface the rear clip had core fill added to increase the stability of the rear clip, this also ensures that there is no show through to the top surface after gluing on the snap clips.
I am happy with the result.
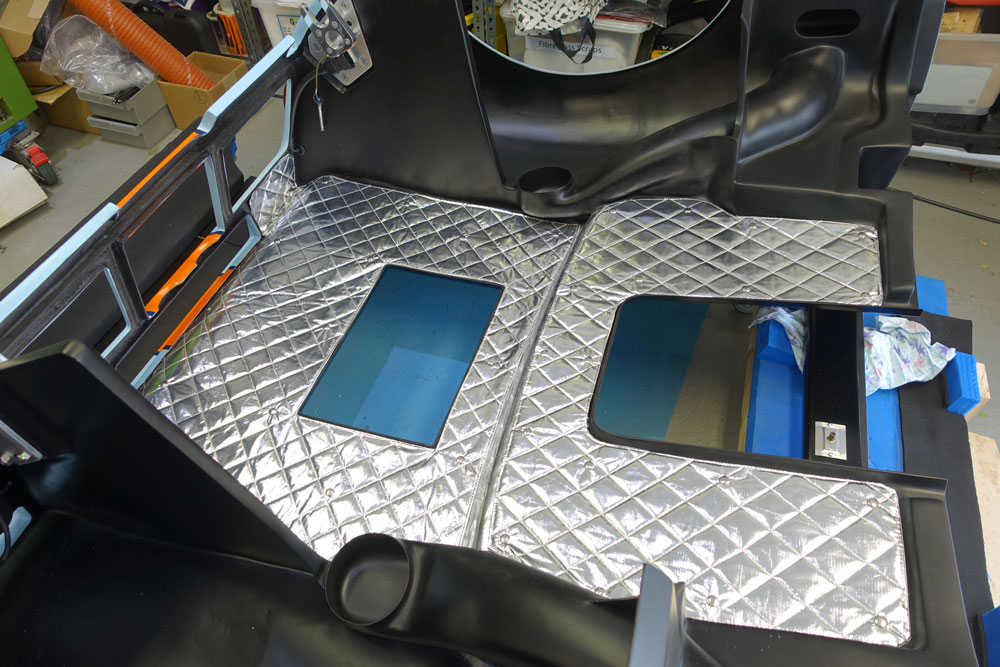
If the heat shield does droop in places I can add some more snap clips. Its a bit flashy, I would have preferred black but it will at least protect the paint.
The protection of the rear clip has been something I wanted to tackle in a different way to many other builds. I really wanted a black material but for obvious heat reflection reasons it was not available. I decided to use a high temperature resistant fiberglass cloth sewn to a high temperature metalised cloth. Its used in high temperature applications (turbo wrapping etc.) and is very light. I always wanted a quilted pattern so I made some templates of what I wanted as per below.
I also did not want to glue the material to the car. I am worried it will fail and drop on the engine so I decided to fasten it at the points below.
This was done with stainless steel press studs. They were attached to an aluminium disc.
These were positioned under the clip and bonded using Plexus adhesive. Under the blue painted surface the rear clip had core fill added to increase the stability of the rear clip, this also ensures that there is no show through to the top surface after gluing on the snap clips.
I am happy with the result.
If the heat shield does droop in places I can add some more snap clips. Its a bit flashy, I would have preferred black but it will at least protect the paint.
Jason - PM sent. I have your 1970 Porsche....
Jason - just reviewing your build log here and I find no mention (unless I missed it) of the device that's placed in the rear clip just over the carburetion area...
What might that be?