AK SPORTS CAR GT40

Just a few photos showing progress made so far.
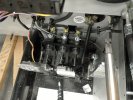
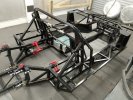
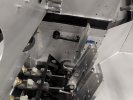
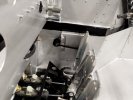
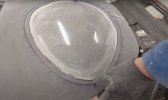
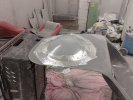
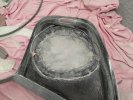
I have cut a hole in the front bulkhead to allow the pedal box to move forward by about 2 inches. this gives a little more leg room.
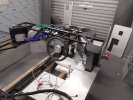
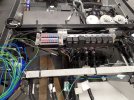
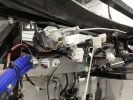
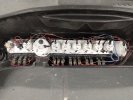
Wiring started and also Terminator x wiring started.
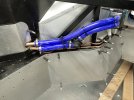
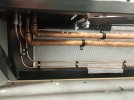
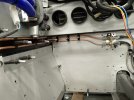
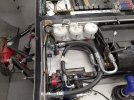
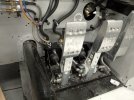
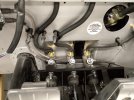
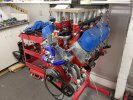
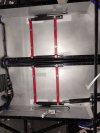
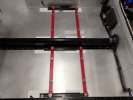
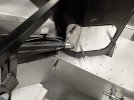
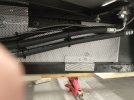
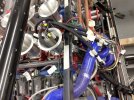
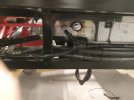
Hydraulic lines fitted and air con lines fitted.
All done on a trial basis before riveting panels as easier that way to cut holes ect.
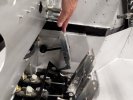
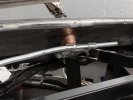
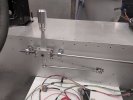
Gear change mechanism now made and fitted.
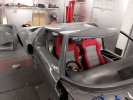
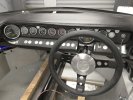
instruments and switches fitted to dash.
I decided to cut out the panel that instruments fit into as it had provision for only 3 gauges angled to driver and i wanted more....
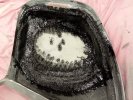
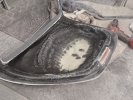
so replaced with alloy panel covered in fake carbon cloth.
and extended down over switch positions.
relays and fuses positioned. going to have a removable panel in spider for access.
Jerry
 

Attachments

  • ac pipes 2.jpg
    ac pipes 2.jpg
    256.9 KB · Views: 387
  • ac pipes 3.jpg
    ac pipes 3.jpg
    405.2 KB · Views: 355
  • ac pipes.jpg
    ac pipes.jpg
    358.7 KB · Views: 335
  • DASH PANEL 1.jpg
    DASH PANEL 1.jpg
    424.2 KB · Views: 336
  • DASH PANEL 2.jpg
    DASH PANEL 2.jpg
    466.1 KB · Views: 335
  • ECU WIRES 2.jpg
    ECU WIRES 2.jpg
    356.5 KB · Views: 320
  • ECU WIRES.jpg
    ECU WIRES.jpg
    457.3 KB · Views: 302
  • gear rod linkaGE 2.jpg
    gear rod linkaGE 2.jpg
    344.4 KB · Views: 299
  • gear ros linkage 1.jpg
    gear ros linkage 1.jpg
    259.6 KB · Views: 303
  • GEAR STICK.jpg
    GEAR STICK.jpg
    245.1 KB · Views: 333
AND THE OTHERS
 

Attachments

  • general view.jpg
    general view.jpg
    403 KB · Views: 328
  • heater and hyd [pipes 3.jpg
    heater and hyd [pipes 3.jpg
    507.6 KB · Views: 325
  • heater and hyd pipes 1.jpg
    heater and hyd pipes 1.jpg
    345 KB · Views: 297
  • heater and hyd pipes 2.jpg
    heater and hyd pipes 2.jpg
    405.9 KB · Views: 303
  • hyd pipes.jpg
    hyd pipes.jpg
    313.3 KB · Views: 302
  • HYD RESEVOIRS.jpg
    HYD RESEVOIRS.jpg
    423.3 KB · Views: 291
  • pedal box 1.jpg
    pedal box 1.jpg
    395 KB · Views: 299
  • pedal box 2.jpg
    pedal box 2.jpg
    325.8 KB · Views: 288
  • pedal box 3.jpg
    pedal box 3.jpg
    345.8 KB · Views: 284
  • realys and fuses.jpg
    realys and fuses.jpg
    492.4 KB · Views: 334
Top work as usual, Jerry. Well done!

Thank you for posting lots of photos as these will become very useful for me when my build starts next month.

I like what you have done around the pedal box. I will be making the same modification to my AK40.

Keep up the good work.
Rob.
 
JUST A QUICK UPDATE...
All wiring for car and ecu now completed.
Stripped back to chassis to allow some mods to give a little more room for the engine.
Now about to turn chassis upside down to fit the flooring.
some pictures attached.
 

Attachments

  • all parts to be refitted..jpg
    all parts to be refitted..jpg
    389.1 KB · Views: 258
  • chassis ready for turning and floor firring..jpg
    chassis ready for turning and floor firring..jpg
    437.9 KB · Views: 260
  • engine remived..jpg
    engine remived..jpg
    447.5 KB · Views: 319

Davidmgbv8

Supporter
Excellent job with your build. Sorry I had not seen until now but keep up the good work and the blog. Where is your internal AC unit going to fit?
 
Been busy doing some house renovations and decorations so not a lot to report...

Finnished floor and fitted the pedal box proper
sorted out the throttle cable connection to the pedal
fittted the wiper motor
added a drop down mount for the seats and runners.
I did not want to drop the floor as wanted to keep a clean underside
I have angled the drivers seat a small amount to the center as that seemed to give me a more comfortable position with feet on pedals.
have done a dummy fit of the rear clip to align with the spider.
next job is to try and make all body panels align as best as i can before cutting and filling to bring all up to same level...
will temp fit front screen and screen that covers engine.
Pictures attached..
Thanks for looking and hope of use to other builders out there.

Jerry
 

Attachments

  • rear clip 1.jpg
    rear clip 1.jpg
    305.6 KB · Views: 148
  • rear clip 2.jpg
    rear clip 2.jpg
    382 KB · Views: 146
  • sat runners 2.jpg
    sat runners 2.jpg
    207.9 KB · Views: 151
  • seat runners 1.jpg
    seat runners 1.jpg
    283.1 KB · Views: 146
  • seats 1.jpg
    seats 1.jpg
    419.1 KB · Views: 153
  • seats 2.jpg
    seats 2.jpg
    392.3 KB · Views: 149
  • seats 3.jpg
    seats 3.jpg
    353.2 KB · Views: 153
  • throttle 1.jpg
    throttle 1.jpg
    273.5 KB · Views: 150
  • throttle 2.jpg
    throttle 2.jpg
    228.8 KB · Views: 154
  • throttle 3.jpg
    throttle 3.jpg
    239.3 KB · Views: 160
I am also doing a full build log on you tube...
Gear mod can be found in this you tube ( towards end of video ) :

or type into Google:

GT40 PART 32 GEAR STICK AND LINKAGE​

and you will find the video

Thanks for compliment
 

Mark H.

Supporter
Thanks for that Jerry. Could you have just machined off the lip inside the the factory cover to get the same result? I have a cable shifter and selecting 4/5 is way to hard for my taste. I need to do what you have done. Well executed!
 
Thanks for that Jerry. Could you have just machined off the lip inside the the factory cover to get the same result? I have a cable shifter and selecting 4/5 is way to hard for my taste. I need to do what you have done. Well executed!
There is not enough 'meat' on the original...
if you look at the original it is necked down at the end.
Also... if idea did not work i needed to be able to fit original..
hope that all makes sense ?

Jerry
 

Mark H.

Supporter
Yes, I just thought about the reducted diameter right after I sent above. Sorry.

What would your thoughts be on a spacer the depth of the shoulder you eliminated from the original cap depth? Place the spacer between the factory cap and the transaxle body? Should be the same outcome.
Another thought, you could use your cap with an adjustment bolt in the end to modulate the spring limit so you could adjust the force to your liking? Could also use the original cap with the spacer making it adjustable too? Just thinking out loud here.

Sent an email to Quaife to see if they have an alternative spring.
Not sure that would work as the principle is to allow the whole mechanism ( spring ect ) to move into the housing unobstructed
Bolt will not work as the spring still has the same poundage.
the ideal solution is a spring with less poundage ..
Jerry
 
Christmas has come and gone and not a lot has been happening !
Started on door fitment and gurney bubble insert.
Although I have the seat nearly touching the floor when sat in car with Helmet on I collide with door top !
SO ....
Gurney Bubble is required... ( there was the option of lowered floor but not keen on protrusion below the floor line .. )
Job was fairly straightforward, I have included some pictures which may assist anyone else considering this avenue.
I have also made a video which can be viewed here:
 

Attachments

  • bubble hole cut.jpg
    bubble hole cut.jpg
    127.4 KB · Views: 67
  • first dry fit.jpg
    first dry fit.jpg
    104.2 KB · Views: 68
  • taped in ready to glass underside.jpg
    taped in ready to glass underside.jpg
    348.6 KB · Views: 68
  • ready to glass in bubble.jpg
    ready to glass in bubble.jpg
    507.8 KB · Views: 67
  • bubble glassed in.jpg
    bubble glassed in.jpg
    544.3 KB · Views: 71
  • inner skin added.jpg
    inner skin added.jpg
    629 KB · Views: 71
  • inner skin now sanded smooth.jpg
    inner skin now sanded smooth.jpg
    515.8 KB · Views: 69
  • fillet added to join.jpg
    fillet added to join.jpg
    321.5 KB · Views: 71
  • bothy bubble done.jpg
    bothy bubble done.jpg
    191.9 KB · Views: 84
Last edited:
Back
Top