
You are using an out of date browser. It may not display this or other websites correctly.
You should upgrade or use an alternative browser.
You should upgrade or use an alternative browser.
Restarting my SLC project in West Texas
- Thread starter felizguy
- Start date
Absolutely, it wil be awesome to see 2 SLCs driving together, We had 2 SLCs when Cam was here visiting, but my car was not running then. weather is looking good for next weekend . I have not work with suede specifically , but I am sure it is not much different than leather.Looking good Hector! Can't wait to see it in person! I'll have to get some tips from you on the leather. I want to cover at least some of my tub with micro suede.
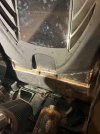
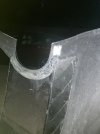
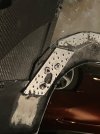
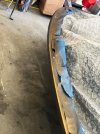
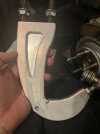
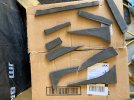
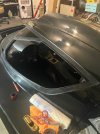
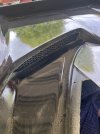
I forgot , that I had to reinforce a few areas on the rear clam. . The painter left the rear clam outside on a wind storm and a portion of the rear clam cracked badly . Also when I cut off the opening for the air inlets it lost quite a bit of rigidity, so I added some aluminum reinforcement .
Attachments
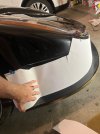
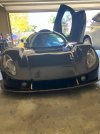
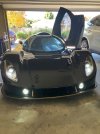
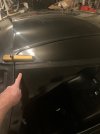
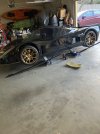
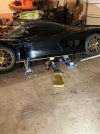
After the sanding and buffing was done I was not going to drive the car without some ppf on the front . I did not do a perfect job, but the point is to protect the paint from road rash. mission accomplished
Attachments

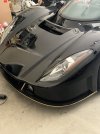
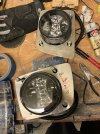
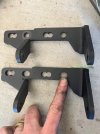
I finally installed the morimoto sealed3 90mm headlights , they are not really fog lights , they have high and low beams . They are impressive. I was nervous beacuse the jaguar headlights are pointing a lot lower on the SLC , so I needed a backup plan. and since I am not using brake ducts , I just made an alumnimum plate and attached it with brackets, The neat thing is that those lights come with a fully adjustable mechanism up and down and sideways . Perfect solution for my light problem
Attachments
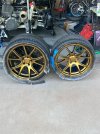
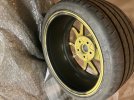
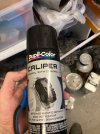
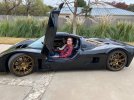
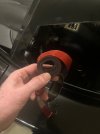
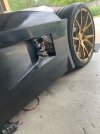
I hate the "gold" wheels I got from the factory, it is an awful yellow-green hue that I can't stand . So I decided to plasti dip them with a pure gold alloy which is a dip pearl type . It is very time-consuming because you need 5 base coats of black and then about 5 coats of gold. But the end result is phenomenal , exactly the color I was looking for . Then had to match the door and front clam hinges, rear vents , gas cap , door handles and locks , as well as added gold stripes to the front splitter and side skirt edges. finally I sprayed all the parts except the wheels with a 2k clear coat , it will make it very hard to remove but it protects the plasti dip very well. Happy to report that gas drips have not damaged the gas cap at all .
It was obviuous that the gold stripes were not going to last, as they get scratched easily , I added a ppf strip to them, perfect, long lasting result .
I also plasti dipped the barrels of the wheels black, because you could easily see the original gold color and that did not look good at all.
It was obviuous that the gold stripes were not going to last, as they get scratched easily , I added a ppf strip to them, perfect, long lasting result .
I also plasti dipped the barrels of the wheels black, because you could easily see the original gold color and that did not look good at all.
Attachments

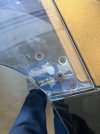
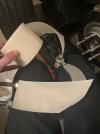
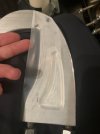
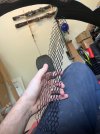
Another thing that drove me bananas was the grinding hinge noise of the doors , I know people have come up with some awesome designs with rollers and all , but I was looking for a simpler solution, how about teflon self stick tape? Brilliant!!!! It reduces 90% of the grinding noise and it is holding up well after a few weeks . I also appiled it to the contact hinge surfaces on the clam .
Attachments
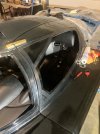
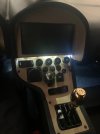
I also finally installed the upgraded windshield wiper switch that Scott 3D printed for the olds steering column, the windshield wiper control lever covered the stereo screen. the knob is perfect, fits on the existing grooves and tabs and it is even labeled . Thank you very much Scott. Beautiful design
Attachments
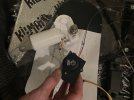
This mod is a bit silly , but I always have trouble leaving turn signals on , and as you know the car is very loud, so regular clicking noises do not work, so I added backup alarm speakers to the turn signal circuit, they are a bit too loud, but if the speaker is partially covered you can achieve the desired decibels, it is under the dash . I did need to use a relay . It works great and has been very useful.
Attachments
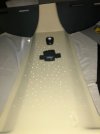
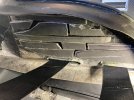
I had a few pieces of luxury liner pro , and I used them to insulate the rear portion of the roof cover , adding more sound and heat insulation between the engine bay and the cabin, more is better, my car is a street car and I care more about comfort than weight ") yes, if it is too loud, you're too old . I get it . I am old
yes, if it is too loud, you're too old . I get it . I am old
yes, if it is too loud, you're too old . I get it . I am oldAttachments
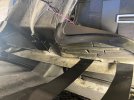
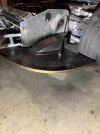
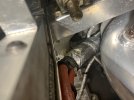
While I was looking around I realized despite the down tube being jet hot ceramic coated and micro louver shields added and about a 1 inch gap the outer insulation around the shifter cables started to melt . More insulation added, I believe that is the 4th layer . Propper insulation of components is a big challenge in this project, because everything is sooo tight , not much space to spare anywhere
Attachments
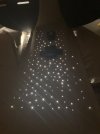
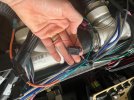
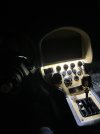
While I was driving at night, I quickly realized that it was very difficult to see the center console controls, so I added some LED lights , initially they were too bright , so I partially covered the openings where the light came through
Attachments
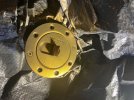
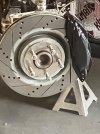
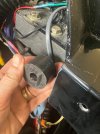
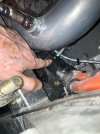
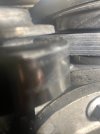
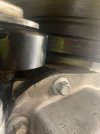
I had a heck of a time getting rid of an a/c compressor belt squeak,I used the dirty dingo kit, first I realized that the bracket was not right, it turns out the owner had made some upgrades that I was not aware off , so I had to order a new unit, the guy did not even give me a discount , since I bought the unit several years ago before the upgrade , then I realized the idler pulley bearing was not pressed fit properly, had to reposition it .
I probably removed and re installed the bracket about 5 times before I got rid of the squeak.
I know most people had good luck with that kit. I certainly did not , had to order a second one and modify it to fit properly, futhermore the owner was not very nice and their customer service totally sucks . I would stay away from that company
Attachments
Similar threads
- Replies
- 6
- Views
- 376
- Replies
- 9
- Views
- 703
- Replies
- 30
- Views
- 2K
- Replies
- 15
- Views
- 1K