Performing Alignments

Ron Earp

Admin
How many of you fellows do you own alignment and how hard is it to do? I'd like to learn how to do alignments, not to the 0.01 degree, or even the 0.1 degree, I imagine that 0.25 degrees would be more than sufficient for my purposes.

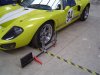
I need to acquire some basic alignment skills. I have successfully measured toe and adjusted it at the track using borrowed toe plates, and made some eyeball camber changes as well. Too much time, and money, is spent dragging race cars around to alignment shops. I need to be able to check alignment, adjust after offs, and generally be able to make changes when I wish.

What do I need?

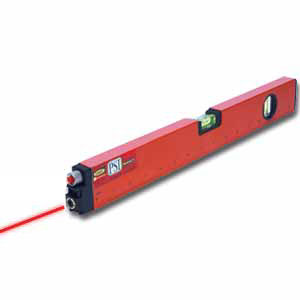
Toe plates would seem necessary.

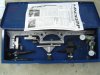
Bubble camber gauge that attaches to hub? Magnetic or hub bolt on?

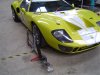
When you make changes do you try and do it as the car is weighted, i.e., on the ground? This would seem to make sense but can be very hard to do under track conditions with cars that have little or no ground clearance.

I know this is a rather open ended topic but I'm interested to see what folks are doing and how they are doing it.
 

Russ Noble

GT40s Supporter
Lifetime Supporter
You want it quick and simple Ron? And ideal at the track for adjusting toe in and camber after an 'incident'.

A pair of string lines, set parallel to each other and the car, down each side of the car at wheel centre height, close to but not touching the tyres and held at each end by a heavyish jackstand. Simple measurements from the string to the rim will give you your toe.

For camber, a builders spirit level held vertically and measure the gap to the tyre sidewall or the rim, at the top. You will know what this should be, all you have to do is replicate it. Between races, if fixing damage, you probably won't have time to muck around with caster, set it roughly right by eye or with the spirit level and it will be fine.

I have read somewhere that some guys have a bar that they clip to each end of the car to take the stringline. This would be quicker than having to move the jackstands to get the parallel stringlines.

If you record your measurements with this 'equipment' with the car properly setup before you damage it, then all you have to do is replicate those measurements. Before going to the track you will of course set your car up initially with driver but measure your reference data without driver.

Hope that's what you are looking for.

Cheers
 
Last edited:
Ron,
Not the most technical description of "stringing" a car. But Larry McReynolds "How to be a winning Crewchief" gives a pretty complete description of the proper way to do it. It also gives a basic breakdown of the cause and effect relationship of the various suspension settings. Although primarily focused toward Nascar and circle track applications the theorys are pretty universal.
 

Ross Nicol

GT40s Supporter
Now now Russ stop flogging that dead horse. I have the string lines on bars at each end of the car resting on stands at wheel centre, this is for toe checks/adjustments. I use a fancy digital level (called an inclinometer) with little blocks of wood against the rim edge for camber and set caster with it working from a known Datum. Have just purchased a set of digital scales for corner weighting. To make a point about caster, It doesn't really belong with Toe and Camber as a dynamic adjustment necessary to fine tune handling. I've altered the caster on the front and rear of my car once and it will only be checked/altered in the event of suspension damage or for major setup reasons.
Ross
 

Ross Nicol

GT40s Supporter
Yes now that I have re-read DFreeman95's post it's negatively directed at Russ' very clear explanation of how to set up string lines and I understand Russ' reply, and completely agree with it. Along with Jac Mac and Russ, I spent the younger years of my life in the South Island of New Zealand. The inhabitants of this isolated area of the world are known for their highly developed ingenuity when it comes to all things mechanical and technical. Just one example is the Hamilton Jet boat, the principal of which exists in all jet propelled boats today. To suggest a book to read is no replacement for someone like Russ who bares his soul with a complete how to description.As we say in this part of the world " Mate you are an idiot".
Ross
 

Ron Earp

Admin
Alright fellows, I think I pretty much got it then. That inside bantering aside (which I'm not sure about getting all of that since I haven't read those books), I think I'll follow what you fellows suggest - eyeball it.

If I have it aligned and like it then I can construct datum points based on the setup. These will be useful provided things don't get whacked or knocked out of align. I can use string to measure, or even solid objects (I like this one, a go/nogo gauge) to adjust things.

My car got whacked recently and it was on the front fender. Unfortunately after my straightening and bondo work the fender was no quite where it used to be in an absolute reference to x,y,z coordinates in space to the rest of the car. My body work is, uhhh, well, it is race quality if one can call it that. So, it is really hard to tell what the front end is doing right now.

I'll get it aligned and make some data points. But, one of those camber gauges still seems like a useful tool for relative low money. Even lower money would be for me to make a hub jig with a bubble level attached to it and some scribe marks. I don't care about "absolute -2.38 degrees camber", as long as "on scribed mark #4 I like the handling".

R
 

Ross Nicol

GT40s Supporter
Ron here are some tips for the Z. After a smack where you want to get the chassis and crossmember back in alignment.Put a hook in the end of a tape measure and put the car up on a hoist.In the chassis rails there is a hole behind the driver's door.Hook the tape measure in the hole and measure diagonally to the opposite sides lower front suspension points. If these diagonals sre not the same you can slot the crossmember holes to correct.I did this with my first Z after finding the steering wheel had to be held with a bias for going straight.If you get within 1 or 2 mm you have the chassis about as good as you need it.
Ross
 
Hi Ron,

My car was originally set up by string lines which was very satisfactory for road use, But as I am using the car more for closed sprints etc like you its good to be able to easily make accurate adjustments and checks (trackside if necessary). I ve recently purchased a dunlop portable aligner and camber caster gauge set and have found them easy to use and extremey accurate.
Photos below

Andrew
 

Attachments

  • DSC02941.jpg
    DSC02941.jpg
    49 KB · Views: 644
  • DSC02942.jpg
    DSC02942.jpg
    59.6 KB · Views: 637
  • DSC02943.jpg
    DSC02943.jpg
    52.3 KB · Views: 647
  • DSC02944.jpg
    DSC02944.jpg
    49.7 KB · Views: 629

Randy V

Moderator-Admin
Staff member
Admin
Lifetime Supporter
I use "Digital String"

Some people would call them Laser Levels...

LLEVEL2.jpg


I have built 12" tall wooden stands for all 4 wheels.

Put turn-plates on the front stands under the tires.

TurnPlates1.jpeg


I first set the ride height by putting a half load of fuel in the car and sand bags to dummy the weight of driver.

Center the steering and lock the input shaft with opposing vice-grips against the chassis to keep the rack from moving.

With the Levels held to the rear wheels at the axle center line (use bungie cords) and level,

I align the toe (rough) to be parallel to the chassis (assuming a symmetrical chassis with parallel frame rails). I prefer Zero Toe on the rear for a number of reasons. Some will become evident by the end of this little tutorial.

To measure Toe, you pick two spots on the chassis that are the diameter of the rear tires. In other words if your tires are 28" in diameter, you pic one spot on the chassis that is say 10" in front of the rear tire and make a mark (masking tape works well) - then measure further forward 28" and make another mark. Using a tape measure - measure between the rear mark and the laser beam - write down the measurement. Now measure from the front mark to the laser beam - write down the measurement. If the front measurement is 1/8" greater than the rear measurement, your rear wheel is toe'd out 1/8".
For the other side - do the same thing.

Using a Camber Guage, I set the rear camber to Zero

664-1137889329817.jpg


Double-check your rear-toe setting and bring to Zero if altering the camber has changed it.

The rear wheels are now aligned at ride-height.

Time for the front.

Make a mark on each front wheel at the rim - at axle center line and level to the ground as in the picture below;
Toe-Setting_points.jpg


With the laser's still strapped to the rear wheels, you can now check your front toe settings. For now we will bring the toe settings to Zero.
Adjust your toe setting with the tie-rods to zero.

Now it's time to set your Camber and Caster using the Camber Guage and Turn Plates. You'll find through this exercise that you'll need to "Un-Lock" the steering input shaft to turn the wheels 20 degrees to set your caster. Remember to center the steering again and re-lock the shaft in order to adjust your Toe setting again.
I set Camber first and then set Caster. I'm not familiar with the preferred settings for the GT40 / Lola / 917 so the mfgrs should chime in on this.

For lack of anything better to go on, I would set the front caster at 4.5 degrees positive and the camber at .5 degrees negative camber for the road. Increase the caster to 6 degrees positive for the track and camber at 1.5 degrees negative.

Final Front Toe-Settings - Add 1/16" to each measurement to bigger measurement and subtract a 1/16" to the smaller measurement account for the full diameter of the tire (it's just a rule of thumb measurement - not really precise but works for me)..
Adjust your toe setting with the tie-rods to 1/16" toe-in for road driving, up to 1/8" toe-out for the track to make your turn-in a little quicker.

You can purchase cheap laser levels at places like Harbor Freight but I;ve found that the cheap ones put out a very wide beam that's a little fuzzy. The more expensive ones usually have better optics. I paid about $60 for the pair that I have and they're fine.

You can get by without turn plates by putting a little sand on the tops of your platforms so the suspension won't bind up too badly when cranking the wheels. Or you can make a grease sandwich from a couple of pieces of linoleum tile with grease in the middle - put the squares under each front tire.

This is what I do on my racecars and have been doing it this way for a number of years without any issues. Before I started using the lasers I used string.

I hope this helps.
 
Ross and Russ,
Not wishing to hijack this tread now that it is back on track......but I do want to clear my name here. Just clarifying that I had no intention of offending or discrediting anybody's explanation. That is not why I am on this forum. My only intention was to offer another source of information. When I stated "not the most technical description of stringing" I was refering to the book I was suggesting. In comparison to other books that focus on the much more technical aspects of racecar engineering this one has a more user and track friendly explanation to those of us who are weekend racers.
 
Last edited:

Rick Muck- Mark IV

GT40s Sponsor
Supporter
AHA!

So "String Theory" DOES apply to GT40s! I have an old friend who worked F1 with Vel's and Indycar with Vel's and others and they used string back in the 70's before the digital revolution.

Rick
 
Strings. Thats what I use too.

At the risk of stating the obvious, I think this is worthwhile mentioning. To get them truly parallel with the car, there are 4 sets of measurements that you need to make.

Assuming that you have a string running alongside each side of the car and tied to a stand at each corner...

a) the distance between the two front stands and the two rear stands must be equal
b) the distance between the two left stands and the distance between the two right stands must be equal
c) The distance from the string to a point in the centre of the right front wheel, and the distance from the string to the corresponding point in the centre of the left front wheel must be equal
d) The distance from the string to a point in the centre of the right rear wheel, and the distance from the string to the corresponding point in the centre of the left rear wheel, must be equal

Note that distances (c) & (d) will not be equal.
Note also that this may result in a parallelogram, but that's OK.
 
Last edited:
Just a question on accuracy. How pedantic do you guys get when aligning the wheels? Using strings, I've noticed for example that I can reasonably easily measure the toe to within 0.5mm but if I then grab the wheel and shake it with all my strength, I find that it can drift anything up to 1mm each way. So is it worthwhile trying to adjust it any more accurately than 0.5mm?
 

Randy V

Moderator-Admin
Staff member
Admin
Lifetime Supporter
Just a question on accuracy. How pedantic do you guys get when aligning the wheels? Using strings, I've noticed for example that I can reasonably easily measure the toe to within 0.5mm but if I then grab the wheel and shake it with all my strength, I find that it can drift anything up to 1mm each way. So is it worthwhile trying to adjust it any more accurately than 0.5mm?

I don't get too crazy about tolerances of under 1mm. I would say that if you are +/- .75mm on Toe settings that you would never know the difference in the handling of the car.
I do recommend that you make sure that all the binding is out of the suspension when you make the adjustments. I use turn-plates to ensure this but I also lightly bounce on the chassis a little after each change to ensure that everything has settled out properly.
 
Ron:
Check out what Longacre offers. I really like the Dunlop gauge, but have had equal success with a string and level, which we had to do in the pits. But this caster/camber gauge Longacre offers looks like it would be very handy: Longacre Racing - Digital No Sweep Caster Camber Gauge

A trammel bar is very good for adjusting camber. You can make one from 1-in. square tubing. Make its length adjustable and, a vertically adjustable pointer at one end and a horizontal flat tab at the other. A piece of masking tap on this is used for marking the front and rear centerline of the tire, which is marked with white chalk or grease pencil.

There's a lot more to this, so get a book for the details. Fred Puhn's "How to Make Your Car Handle" is a good one.
 

Russ Noble

GT40s Supporter
Lifetime Supporter
Strings. Thats what I use too.

At the risk of stating the obvious, I think this is worthwhile mentioning. To get them truly parallel with the car, there are 4 sets of measurements that you need to make.

Assuming that you have a string running alongside each side of the car and tied to a stand at each corner...

a) the distance between the two front stands and the two rear stands must be equal
b) the distance between the two left stands and the distance between the two right stands must be equal
c) The distance from the string to a point in the centre of the right front wheel, and the distance from the string to the corresponding point in the centre of the left front wheel must be equal
d) The distance from the string to a point in the centre of the right rear wheel, and the distance from the string to the corresponding point in the centre of the left rear wheel, must be equal

Note that distances (c) & (d) will not be equal.
Note also that this may result in a parallelogram, but that's OK.

Chris, you're right about not being too pedantic, for all practical purposes a string line is plenty accurate enough.

However you are making too much work for yourself, the way you set up your strings. All you need are two parallel lines either side of and parallel to the car. The distance between all the stands is irrelevant because you are measuring the distance between the strings at right angles, not the distance between the stands which doesn't matter. Also it's not necessary for them to be the same distance offset from the wheels because what we are actually measuring is the difference between the front and rear of each wheel. So if your line was, say, on the left side 10mm from the rear tyre and 30mm from the front tyre and on the right side say 15mm from the rear and 35mm from the front and the distance between the strings front and rear is the same then you have all you need.

Bearing in mind, after a shunt, that we are probably talking extremely limited time to repair and setup the suspension before the next race, the quicker you can set things up the better. If you run out of time, so long as the wheels are turning, you are probably going to be getting out on the grid with whatever setup you have had time to do anyway!

With that said undoubtedly if there is a system out there that is quicker to set up and use than a stringline and spirit level then it would worth having.

DFreeman 95. Sorry, I read your post the wrong way. No offence taken, just took a tongue in cheek opportunity to 'poke the borax' as some of the more pedantic types on here. I guess I should just leave the pendantic people to enjoy their pedancy.

Cheers
 
Last edited:

Malcolm

Supporter
I have seen guys that have special bars made that fix to the car with the centre line marked on them plus holes correctly drilled so that there is no setting up or cross measurements to be made. Drop the bar in place, thread the strings and bingo they are parallel! But you need to make the effort to create these bars in the first place. However it is now something I am thinking of doing having read this thread and needing a toe alignment check. If you still want to use stands to rest the bar on, measure and mark your car centre line and then just have a centre pointer on the bar to align with the mark.

You can get cheap ish string guages for measuring camber, think of a plumb line with a back board with degrees marked on it. Demon Tweeks flog them for about £50, there are cheaper places I am sure. I have three camber castor guauges. A digital one, a good bubble guage one and this string one. The string one is really quite fool proof and reliable although I mainly use the bubble guage as it is magnetic, good for knock on applications as it sticks onto the spindle nice and square.

Thanks for this thread it has encouraged me to do my own toe in measurement now.

On turn plates settng castor, over how many degrees do you turn the wheels? Is it 20 degrees each way? I can never remember!
 
Back
Top