
You are using an out of date browser. It may not display this or other websites correctly.
You should upgrade or use an alternative browser.
You should upgrade or use an alternative browser.
AKSPORTSCARS #17
- Thread starter Blwngt40
- Start date
Good news, and slightly indifferent news for me. I received my Quaife ZF, but was for some reason removed from its pallet during shipping and suffered nicks, scraps, and gouges, as well as did the shifter setup received with it. FEDEX re packaged it at the last hub before delivery, but didn't really do anything to help outside of that.
Other sad note is I ordered the 3.500:1 final drive and received the 3.750:1.
Sad things like this happen when you wait so long.
The vendor used is being very on top of helping to address issues, this part I am happy with.
Image below is how it was repackaged..

Other sad note is I ordered the 3.500:1 final drive and received the 3.750:1.
Sad things like this happen when you wait so long.
The vendor used is being very on top of helping to address issues, this part I am happy with.
Image below is how it was repackaged..

Thats not good. I am looking to order a ZFQ soon and was going to go for the 3.75 option. Maybe I will go collect mine if that was your story! Was there any particular reason you chose the 3.5 drive ratio? I was going 3.75 as more punch out of corners and from standing starts. Both ratio top speeds are way quicker than I ever expect to go, if my engine could actually pull the revs.
") My calcs showed a 200 rpm difference at 80 mph.
My calcs showed a 200 rpm difference at 80 mph.I have been traveling for work a lot lately and it has taken away from me working on the car. I originally was making my own pedals as you can see below but ended up not being happy with the gas pedal multiple times. and ended up buying a set from Superformance. Which I then had to modify anyways because the clutch pedal was in the middle of the support rather than the edge. Made up my own dead pedal and the throttle linkage and brackets for one of JimmyMacs castings that magically made its way to me after being in multiple hands.


I have been making a mess lately.
Covered the engine in plastic sheet, covered with spray foam. Used skewers to mark and measure out to a decent depth for clearance to engine and rasped down.
Passenger seat will take some tinkering to make comfortable because of the super charger belt but at least it aligned well with the tunnel.
now to fill in with body filler, sand down. And make my composite bulkhead. I will be using a honeycomb core to strengthen it up and add supports on the rear side once i cut out an access panel area.
Well the plug is made, just need to clean up some areas, reinforced it a bit for vacuum bagging. The final product will have an access panel portion in it. She does sit tight, I will.be trimming stud lengths down on the front of the engine as I do not need any of them. I have very ridgid motor mounts also to limit engine movement.
Final product will be a combination of carbon fiber, a 2mm honeycomb core, and reinforced areas where flexing is most likely to occur.
Once it is finished, I then can work on the seatbelt mounting bar.....


Final product will be a combination of carbon fiber, a 2mm honeycomb core, and reinforced areas where flexing is most likely to occur.
Once it is finished, I then can work on the seatbelt mounting bar.....
Last edited:
Davidmgbv8
Supporter
Do you have a drawing you can share for the new center tunnel I would rather do that with mine vs making a cap.Swapped out center tunnels today. Slow and steady progress. View attachment 139294
View attachment 139295
Like always, work and waiting on delivery of something else has delayed me in the garage. So I made my lower seat supports. Needs cleaned up, deburred, and webbing clip holes lunched. Then when installed supports added to prevent being pulled down like the originals.
Shape is based on original design shape but adjusted for my build. Decided that I would just make 4 rather than one, and 3 curved angles for the middle and passenger side.

Shape is based on original design shape but adjusted for my build. Decided that I would just make 4 rather than one, and 3 curved angles for the middle and passenger side.
Since I recently pulled my shrinker and stretcher out of the depths of storage. I believe I will attempt the gas pedal again.The two pads are a little tricky to make,but worth the effort as the throttle pedal is a nice piece
Once again traveling for work in the way. Got back just for the two days for the weekend and took some of that time to get the removable panel sort of done. Gives plenty of room for the accessories.
The bulkhead in the picture is not the one I am using, it is the one AK provided but I cannot use.

Potted in recessed and countersunk screw washers with cab-o-sil and resin.

Closer up picture.

The bulkhead in the picture is not the one I am using, it is the one AK provided but I cannot use.
Potted in recessed and countersunk screw washers with cab-o-sil and resin.
Closer up picture.
Cut out engine area, will trim a little more by the supercharger snout to accommodate for engine ine torquing over. Riveted in floating nutplates.
I feel like I am never getting anywhere with this, but I haven't really gave it more than an hour or so at a time when allowed, and this morning i for this all fitted up.


Next weekend I am going to pull the engine out since I am happy with the fit and clearances to parts. Then finish up the rest of the frame welding I cannot do with the engine in the way. Closeout the tunnel and add bracing for seat harnesses.
If I add a window it is going to have to be small. Atleast over the supercharger.

Also made a clay negative of the gauge angle as i plan on adding two on each side and would like them to match angles. Will make this out of glass and resin.
I feel like I am never getting anywhere with this, but I haven't really gave it more than an hour or so at a time when allowed, and this morning i for this all fitted up.
Next weekend I am going to pull the engine out since I am happy with the fit and clearances to parts. Then finish up the rest of the frame welding I cannot do with the engine in the way. Closeout the tunnel and add bracing for seat harnesses.
If I add a window it is going to have to be small. Atleast over the supercharger.
Also made a clay negative of the gauge angle as i plan on adding two on each side and would like them to match angles. Will make this out of glass and resin.
Ian Anderson
Lifetime Supporter
A lot of work done there…. Have you tried placing your seats? That bulge in the firewall will have you sitting up against the steering wheel, so unless you are about 5 foot tall with short legs you will battle to fit.
The "bulge" is mostly exactly over the center of the tunnel area. The stick out from the panel isn't as much as the pictures make it seem in the area the seat sits, with a bit of the right side for the passenger. The pulleys are mostly on that side.... so sucks for them....lol The driver side is pretty smooth. I have placed the spider on it with the dash, and setup some supporting material to sit on fir testing. I used some 5 inch thick foam for the back and leg area for testing and I fit with room. Not smashed up on the steering wheel.A lot of work done there…. Have you tried placing your seats? That bulge in the firewall will have you sitting up against the steering wheel, so unless you are about 5 foot tall with short legs you will battle to fit.
The seats are going to be customized for forming to fit the bulkhead for maximized room, but still to give support and some comfort. That was one of the first concerns with this engine choice.
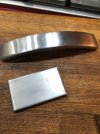
Made a mess in the garage today. Well everytime I go in there I have to clean up from the last time I worked because it becomes a mess from making things.
Milled out two teflon blocks for supports for all the plumbing going through the tunnel.
Tomorrow, I am gling to flip the frame and fit all the tubing, cut to lengths needed, weld on the A/C fittings and AN fittings. Insulate the tubing and hopefully seal up and rivet the floor panel on.
The tunnel will house the two 1.5" coolant tubes, 1" tubes for the intercooler coolant, air purge line from radiator, A/C lines, clutch, and rear brake line.
I will be insulating them with the material we use on corporate jets water lines outside the pressurised areas. So hopefully that should be good enough.
Similar threads
- Replies
- 0
- Views
- 1K
- Replies
- 7
- Views
- 2K