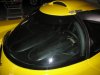
Way back I took a sharp left turn off the normal path of my build, and decided I wanted a trunk up front. That meant moving the radiator to the passenger side of the engine compartment. I knew that would present as cooling challenge since the radiator would receive very little ram air back there.
The coolant temp was actually not bad, until I got the AC working. The AC drove the temperature up another 10 degrees. I'm happy to report that I finally got the temperature where I'm comfortable with it now.
Here's a recap of the radiator relocation work:
The coolant temp was actually not bad, until I got the AC working. The AC drove the temperature up another 10 degrees. I'm happy to report that I finally got the temperature where I'm comfortable with it now.
Here's a recap of the radiator relocation work:
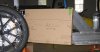
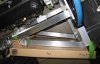
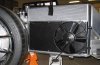
- I started by working with the Thermal Engineer who builds radiators for NASCAR, desert racers, etc teams. I mocked up the radiator size and he designed the radiator. The radiator is the largest size possible that will fit in the given space. At 19" x 27" its significantly larger than the stock SLC unit. We then fitted the most powerful SPAL fans that would fit in the tight space.
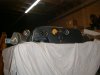
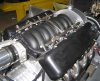
- I designed an expansion tank that is mounted to the front of the motor and had it built by a local aluminum fabricator.
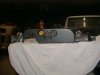
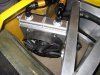
- Added a large oil cooler on the driver side. It's kinda in the way when you want to do maintenance, so is mounted so it can be removed quickly. Just 4 1/4-20 screws, a weatherPak power connector, and 2 quick disconnects for the oil lines. I used valved Jiffy-Tite oil line quick disconnects so they automatically seal when pulled apart to keep oil from dripping.
- I did quite a bit of air flow testing to optimize the air flow so it would be driven thru the radiator. I Check out these videos:
- Baseline airflow test. There was significant turbulence and quite a bit of the air was circulating forward and being dumped out the front of the opening and over the top of the radiator.
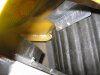
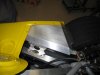
- Final airflow test. The following changes were made: Added vanes to smooth and direct airflow, added an air scope at the leading edge of the rear fender well, added a panel to the front of the belly inlet opening to keep circulating air from dumping out, fabricated a sealed air box around the inlet side of the radiator to contain the ram air pressure, and added a belly pan on the outlet side of the radiator to form a low pressure zone.
Attachments
-
 IMG_2976.jpg204.6 KB · Views: 530
 -
 IMG_2977.jpg174 KB · Views: 466
 -
 IMG_3096.jpg175.3 KB · Views: 519
 -
 IMG_3130.jpg257.2 KB · Views: 531
 -
 IMG_3167.jpg163.1 KB · Views: 505
 -
 IMG_4475.jpg147.2 KB · Views: 471
 -
 IMG_3170 (2).jpg193.4 KB · Views: 459
 -
 IMG_5075.jpg168.8 KB · Views: 562
 -
 IMG_5074.jpg104.9 KB · Views: 496
")