For those that were curious how the Aramid honeycomb panel was going to work out…I think it will be a good solution as the rear bulkhead panel. I have epoxied a couple aluminum strips to the sides of the main center panel (and will make top and bottom as well) to secure it to the frame structure. Once the engine is installed, I’ll end up cutting a relief for the water pump pulley and will fabricate a cover.


You are using an out of date browser. It may not display this or other websites correctly.
You should upgrade or use an alternative browser.
You should upgrade or use an alternative browser.
Classic HorsePower Scratch GT40
- Thread starter Wolfman
- Start date
Mark Turner
Supporter
That looks awesome! have you given any thought to a double pane rear window?
That’s a definite possibility but hadn’t until your suggestion…hmm. Easy enough to add after seeing how much noise & heat I get once running it around a bit. Wonder how many others have done and their opinions??That looks awesome! have you given any thought to a double pane rear window?
Joe, I am using the Aviaid pan. I accidentally bought one a while back that wasn’t for use on a 289/302 block and sold it but had another one for this build.Wondering why you decided to not use the Aviaid oil pan?
Joe I sent you a PM on your questionsWhat part number did you go with for the pan? I’m using an 997 trans and have seen where other guys have had to modify their pans for starter clearance. I’d like to avoid that if possible.
And where did you source your valve covers…Tornado?
Bulkhead panels complete, middle section will be screwed in place and outers riveted. Triangle side panel will have a couple of aircraft circuit breakers for the fuel pumps adjacent to the backside. Also added a couple support hoops for the center console to support hand/ body weight while getting into & out of the seat

Front section is removable and ready for chassis black paint. Also, in pic is the removable footwell top and air conditioner evaporator support bracket.

Front section is removable and ready for chassis black paint. Also, in pic is the removable footwell top and air conditioner evaporator support bracket.
Shifted temporary focus to my dash this week. I made the switch plates after buying a pair that didn’t fit my particular molded dash. Fabricated it out of the same aluminum sheet that I’m using for the chassis panels and am presently marking out the layout and spacing for what I will be using. Used a 1/2” & 1” round tubing to help get the desired bends and curvature.

Adrian Starling
Supporter
Darius Rudis
Supporter
My pre-started (by previous owner) had a "flat panel". So I finished it with that currently. Then once car is completed (painted, and driving...) will go back the following year and redo the dash for curved panel.

I like that idea Darius…gives you a chance to live with it and make any changes before you make it “permanent”. Mine didn’t come with any panels but lesson learned on how much more difficult I made it in my mind than actually fabricating a set. I’ll have my fiberglass panels for sale for anyone that needs a set (Tornado sized) for their build.My pre-started (by previous owner) had a "flat panel". So I finished it with that currently. Then once car is completed (painted, and driving...) will go back the following year and redo the dash for curved panel. View attachment 144784
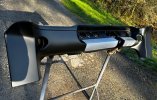
The great debate…to strap it on or not (so to speak). My fuel tanks came with hanging brackets but after filling the tanks and finding that they were 10.3 gallons per side…that’s 63lbs plus the weight of the tank itself, so estimate 70lbs hanging by 2 welded aluminum brackets. I felt it couldn’t hurt to have the added support of two aluminum straps helping ease the load. I stayed with aluminum for these since my thought process was for them to deform with the tank rather than have them stronger than the tank aluminum and possibly puncture the tank in the case of a side impact (low speed of course). Someday I may change my mind on this but made them with a silicon rubber lining and doesn’t add any more outward bulk to the close quarters of the rocker cover.
I also relocated the chassis back to my rotisserie in preparation for its time to be painted in chassis black.

I also relocated the chassis back to my rotisserie in preparation for its time to be painted in chassis black.
Since it’s too cold to do the chassis paint, I prepped it and applied seam sealer to appropriate joints and worked on the parking brake pulley mechanism. After hunting for a correct sized 90 degree cable guide, I resorted to fabricating my own 90 degree pulley bracket. Due to the compact spacing and sourcing a standard/generic cable kit, I couldn’t get an appropriate turn on the cable to maximize the spacing from the crank pulley to where the handbrake is located in the cockpit.


Had an afternoon of semi warm temps and little to no wind so ended up spraying satin black on the chassis but needs a couple of days now to fully cure. In the meantime, I made the side sill covers and covers for the end bay sponsons. More painting is on the horizon for a couple chassis spots and additional separate pieces to be installed later.


Mark Turner
Supporter
Now you get to enjoy the rewards for all of your hard work, I am so excited for you to be at the final assembly stage!
Similar threads
- Replies
- 5
- Views
- 3K
- Replies
- 53
- Views
- 10K