Classic HorsePower Scratch GT40

More panels…front windscreen base, front and rear bulkhead window area and small filler for base of door posts. Thanks to Llamabite for an excellent rear window and one less thing I have to make from scratch.

One purchase I am using more than I thought I would, is an awesome timesaver and enables a more professional panel is my hydraulic hole punch in various sizes from 3/4” to over 4”.
IMG_9449.jpeg
IMG_9471.jpeg
IMG_9473.jpeg
IMG_9463.jpeg
 
Last edited:

Mark Turner

Supporter
More panels…front windscreen base, front and rear bulkhead window area and small filler for base of door posts. Thanks to Llamabite for an excellent rear window and one less thing I have to make from scratch.

One purchase I am using more than I thought I would, is an awesome timesaver and enables a more professional panel is my hydraulic hole punch in various sizes from 3/4” to over 4”.
View attachment 142078View attachment 142079View attachment 142080View attachment 142082
Looks like you are having fun, I cant wait to start my build but LIFE keeps getting in the way.
 
Slow but steady progress in paneling. Plan is to paint paneled chassis in satin black so am not concerned with nice shiny aluminum and will sand it all in prep stage.
IMG_9521.jpeg
IMG_9522.jpeg
 
Still not satisfied with my current panel warpage at the rear end of this panel so will work with some shrinkage techniques to make it lay a little flatter before securing to the sponson. The ribs turned out satisfactory and am please with the longitudinal stiffness and how straight it lays in that direction. This is my first effort (with a few test pieces) at using a bead roller so more experience is needed and unfortunately I don’t have an English wheel to help in preparing these pieces for the bead roller stretching the metal which isn’t helping my slight warping issue.
IMG_9529.jpeg
 
Worked with this panel a bit more by heat shrinking about 50% of the warping I had out first and about another 25% by adding a short 90 bend on the outside edge of the panel. After drilling and cleco fastening it down, I'm satisfied with it enough to keep my effort in the panel instead of remaking another. With a little more work and a few more fasteners on the outside edge (once sill panel overlays the edge) and the faux access cover bolted down it should be worthy of my satisfaction. The seams between this panel and the inside cockpit & bulkhead will be unnoticed with total chassis black.

BTW I got the steering wheel mod to my bead roller from one of our great builders here as well as a quick and functional fence to keep my work straight after the 30-40 different passes through the rollers.

IMG_9533.jpeg

IMG_9534.jpeg
 
Need a couple opinions and/or experience on needing access to the fuel neck and vent connections. I’m planning on enclosing this area and sealing it from the cockpit for obvious safety reasons as you can see with these pics.

My going in plan is to permanently seal the inside box and have access through the wheel well area with a removable panel for the neck and vent connections. My biggest concern is keeping it mostly moisture proof and having enough room (initial look is it’s adequate?). Your thoughts??

IMG_9557.jpeg
IMG_9558.jpeg
 

Randy V

Moderator-Admin
Staff member
Admin
Lifetime Supporter
Nice work.. My thoughts are in line with my past experiences - as soon as I made something that is not structural “not removable” I regretted it at some point in the future.
 
Nice work.. My thoughts are in line with my past experiences - as soon as I made something that is not structural “not removable” I regretted it at some point in the future.
Thanks for your insight Randy. Rivets are a bit easier to remove than welds LOL. I am definitely making the sill covers and at least these front covers bolt on. I have yet to mount them so have time while making these other panels around that area. I am keeping this in mind and trying not to block these covers with the design of them just in case I do want the option of removing them hopefully without having to remove the dash.
 
Some more finishing work to do but happy with the progress and a model for the passenger side. Looks like I need to raise the bottom cut of the dash about an inch also.
IMG_9566.jpeg
IMG_9567.jpeg
IMG_0434.jpeg
 
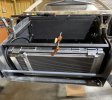
Moved my focus to the front subframe. Since these were the largest pieces of sheet metal I have left to address, I wanted to knock them out.

Made the floor section first, drilled and secured. Made a pattern and spent 1-2hrs getting the cardboard shape right before cutting the side panels. Once the outer shape in metal was fine tuned, I turned to punching the proper holes & their placement in for access of the steering rack, sway bar, clam pivot bolts, and front cross bar. Have I said how much I love my hydraulic punch??

Next I’ll refit the front clam and check fitting now that it’s all in metal.
IMG_9582.jpeg
IMG_9593.jpeg
IMG_9594.jpeg
IMG_9586.jpeg
 
Did you use canned spray foam for your spider?
So far, yes spray foamed (minimal expanding) in roof of spider as I epoxied the inner & outer panels together, foamed the A pillars and formed the shape and glassed over them, and foamed between the trapped area between bulkhead door jam and engine bay aluminum. I also plan to do some on the upper bulkhead on either side of my rear window.

Got my Aramid honeycomb panel delivered so I will be working with that soon on how to secure it and make removal easy for the heat & sound insulation qualities of it being my main bulkhead panel behind the seats. One challenge with that is a small bump out cover for the water pump that has to be added as well.
 
Made mounts and tabs for the shifter, hand brake lever, and center tunnel / console.

I expect to have room and run the waterlines (both radiator, heater & bleed lines) through the center spine and AC, electric and brake & throttle lines/cable in the space under the console cover (to be fabricated).
IMG_9633.jpeg
IMG_9630.jpeg
 
Porsche Boxster shifter and cables are working out nicely so far and trial fit indicates they are perfect length as well. A little trimming to the shifter base made it close to 5 inches wide.
IMG_9658.jpeg
 
Back
Top