
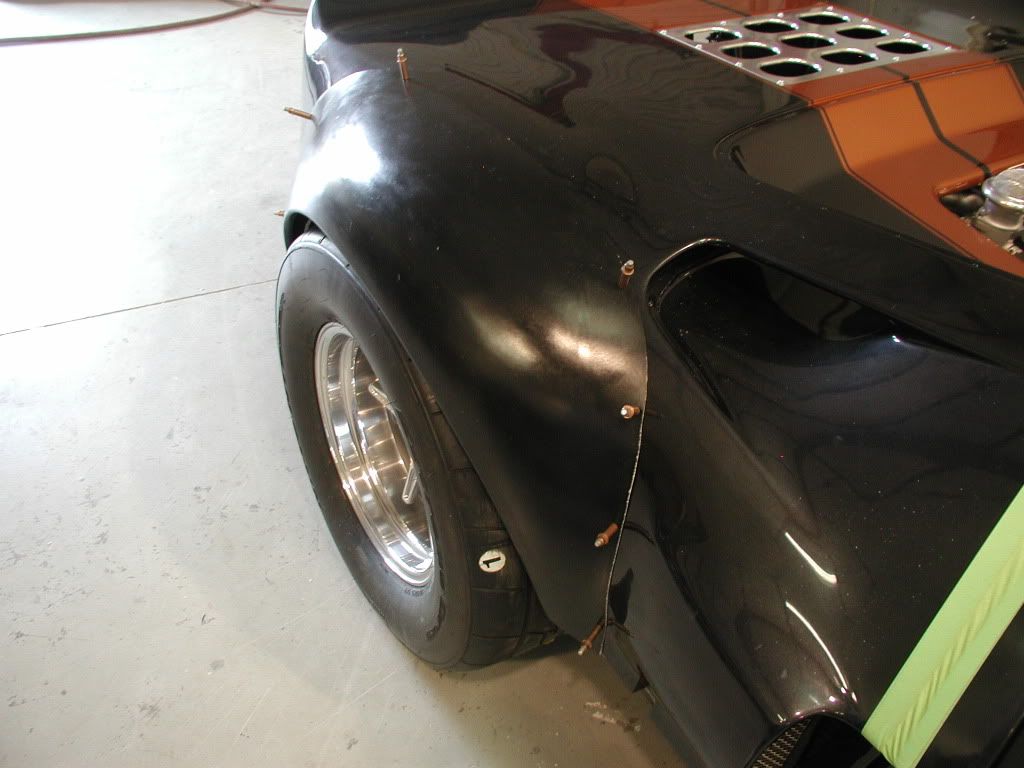
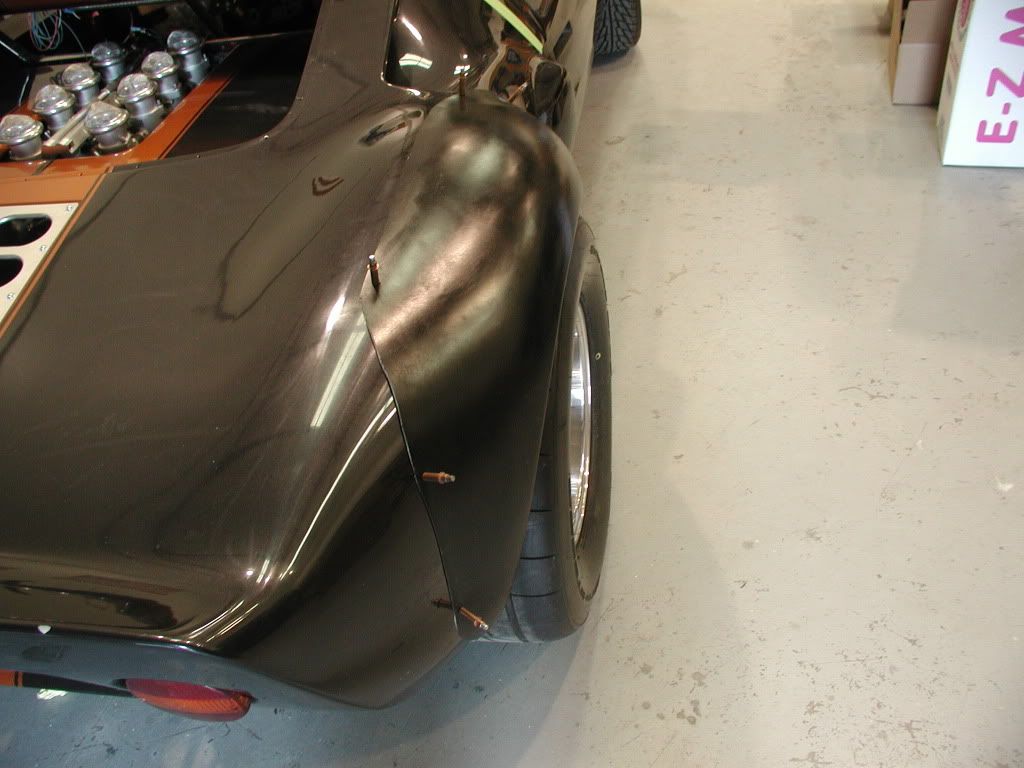
We all make mistakes as we go along on these builds. Mine is one or the mistakes that usually comes as we first start driving the cars we have never driven before. Although I don't consider myself as a rookie, having driven the car all summer, I still made the mistake of being in a hurry. Mine started on a Saturday afternoon as I wanted to calibrate my speedometer. One of the last things I needed to do. As I was getting ready to get in the car some kids that lived in the neighborhood stopped by an wanted to see the car. Obligingly I showed them the car, raising the front and rear clips and then closing them. The meeting finally ended and I informed my wife I was out to do the calibration. I jumped in the car and headed out. My Stewart Warner guage is one that you have to drive a measured mile and then the speedometer is set for the number of revolutions needed. this was accomplished without a hitch. Once done I wanted to see if the guage was really calibrated. I pulled away from the stop light at a brisk pace and acelerated up to about 45 mph. As I reached 45 in second gear, I heard a loud bang and thought I had blown the engine. One look to the rear told me it wasn't the engine, but was the rear clip unhitched and dragging on the asphalt. Seems I had forgotten in my haste to latch the Aerocatch fasteners(which I had bought to prevent just this from happening). It was still attached to the frame but dragging along behind. Pulled over and "folded" the rear clip like a limp piece of spaghetti back onto the car. I limped home and then surveyed the damage. It took a while to figure out all the damage. The first was the obvious. Both fenders were fractured.
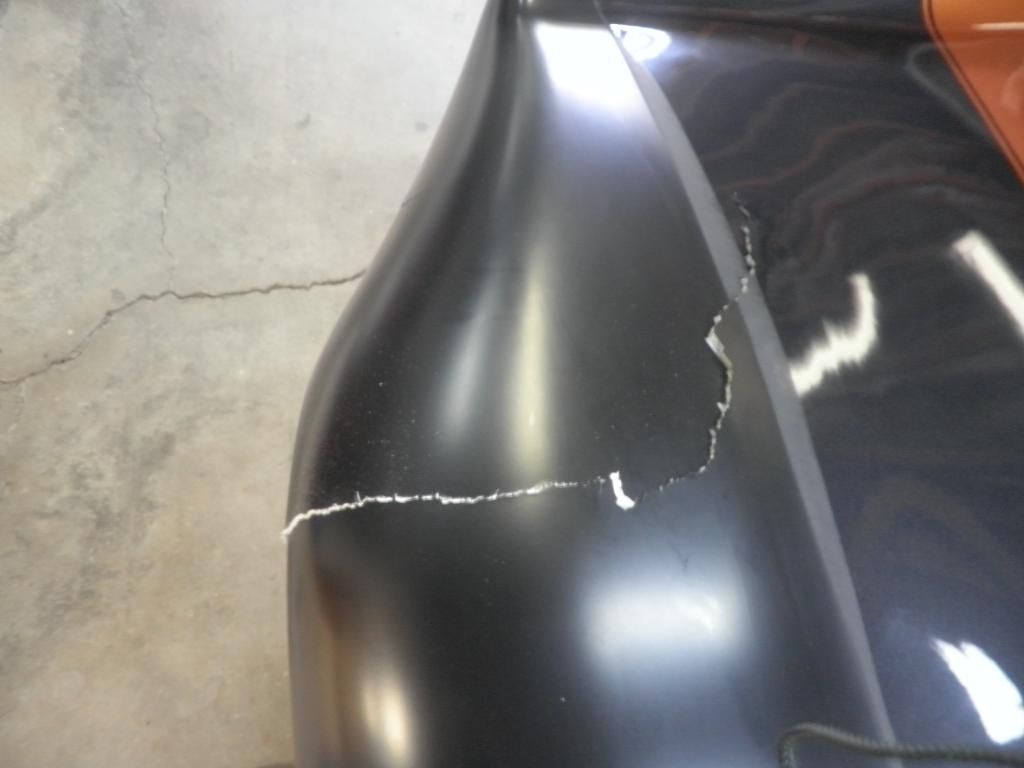
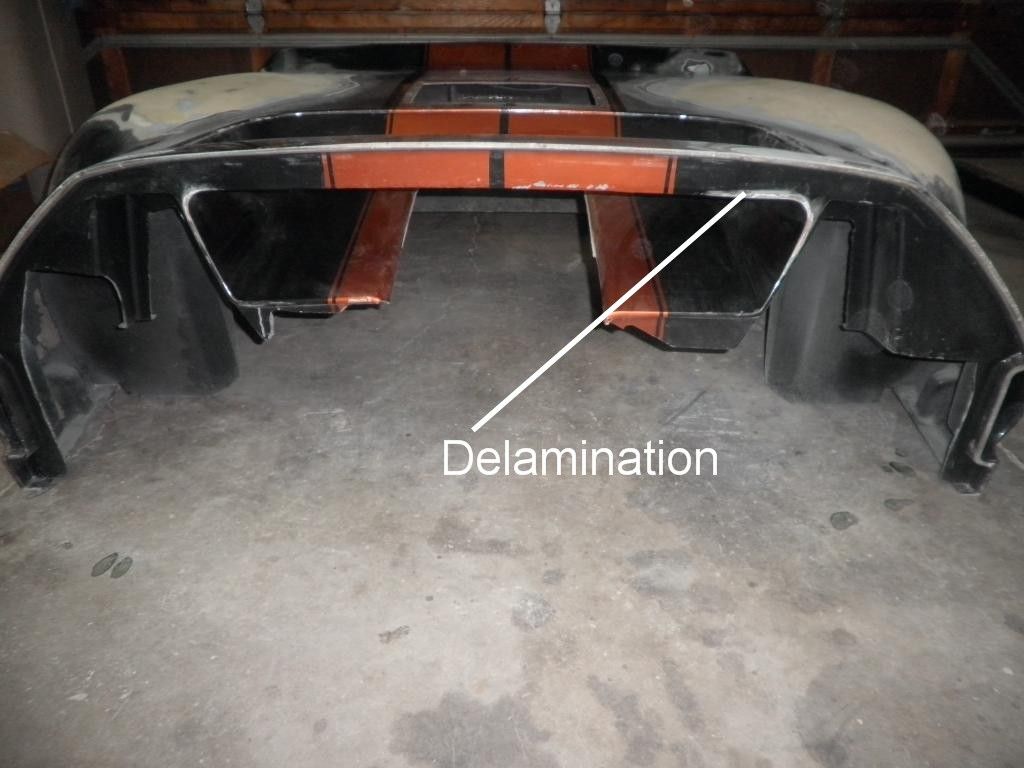
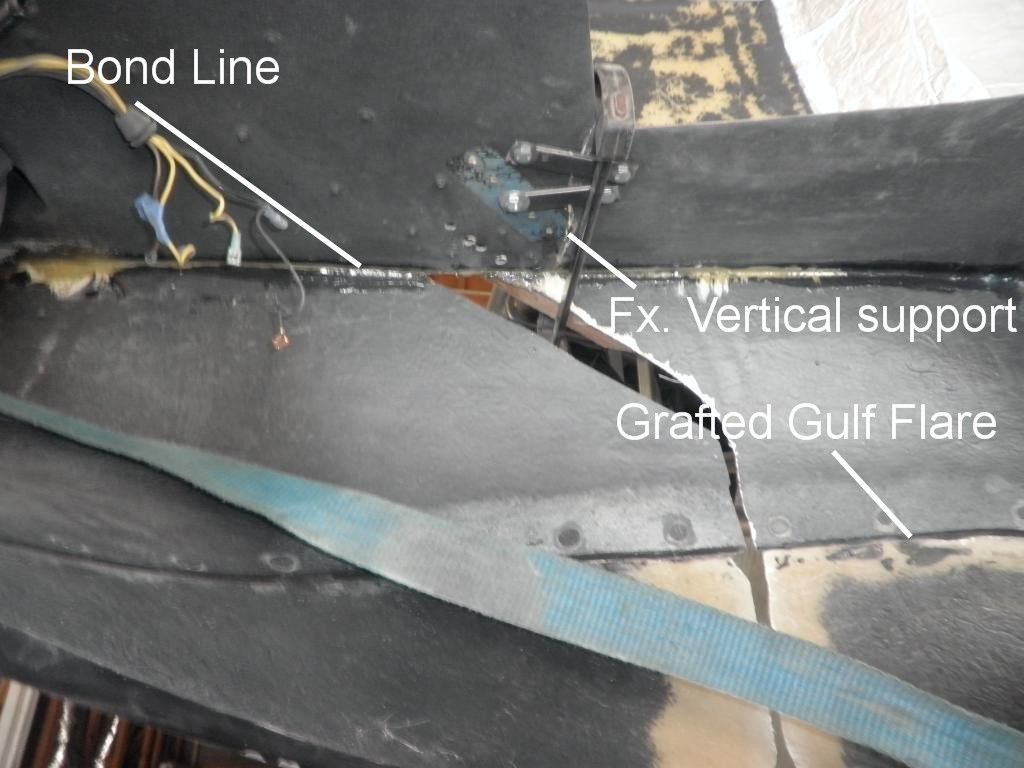
From the "folding" of the rear clip I knew that the the vertical supports to the fenders were broken as well. Further examination showed areas of delaminations in the upper portion of the rear clip.
These were dug out and fresh resin applied along with filler.
Having just gone through two scares of cancer, one with my wife and one for me(mine was negative hers wasn't, but is all clear now) I knew I could not afford to have the repairs made, or purchase a new rear clip. So I took on the challenge and decided to do the work myself. It is amazing what you can learn when you need/have to(thank you Youtube) [ame=http://www.youtube.com/watch?v=yoURRmkD8MY&list=TL1nfjNHGxHeA6Z1Jlk-qzKOi1xIxyz993]There's A Hole In My Boat~ Gelcoat Color Matching (Part 1) - YouTube[/ame]. I investigated the fractures further and found that the bonding to the vertical uprights were broken and the bonding of the gulf flares on one fender was broken as well. The flares were added when the tires were sticking outside of the fenders.
The first order of business was to cut away the fractured fiberglass.

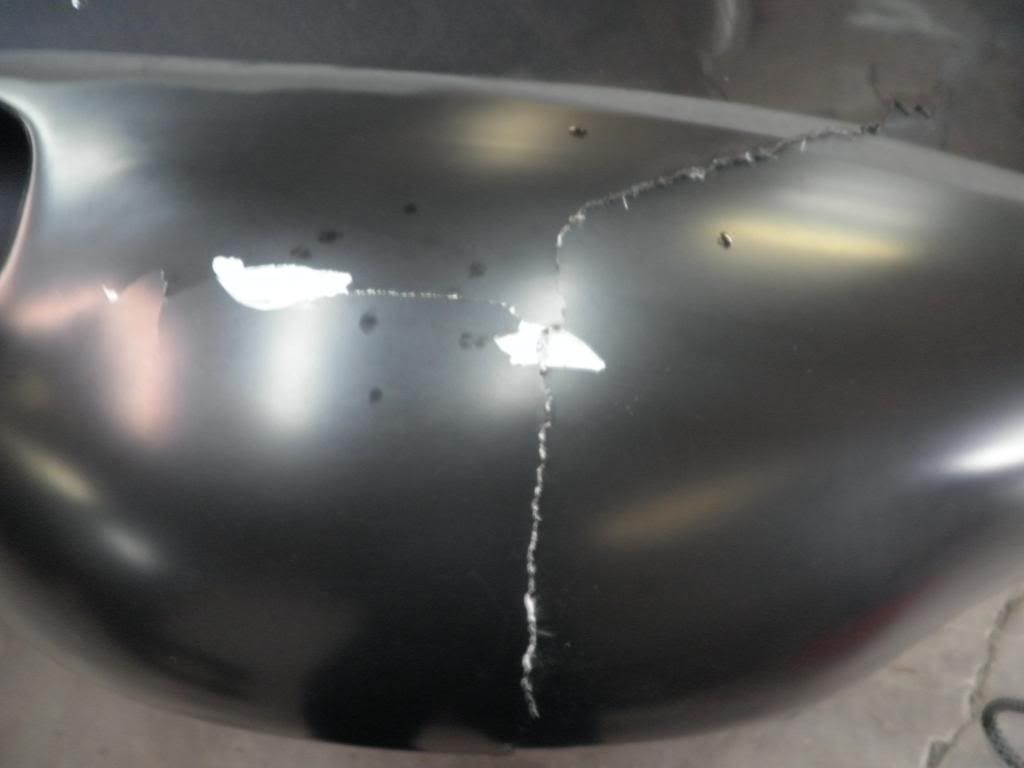
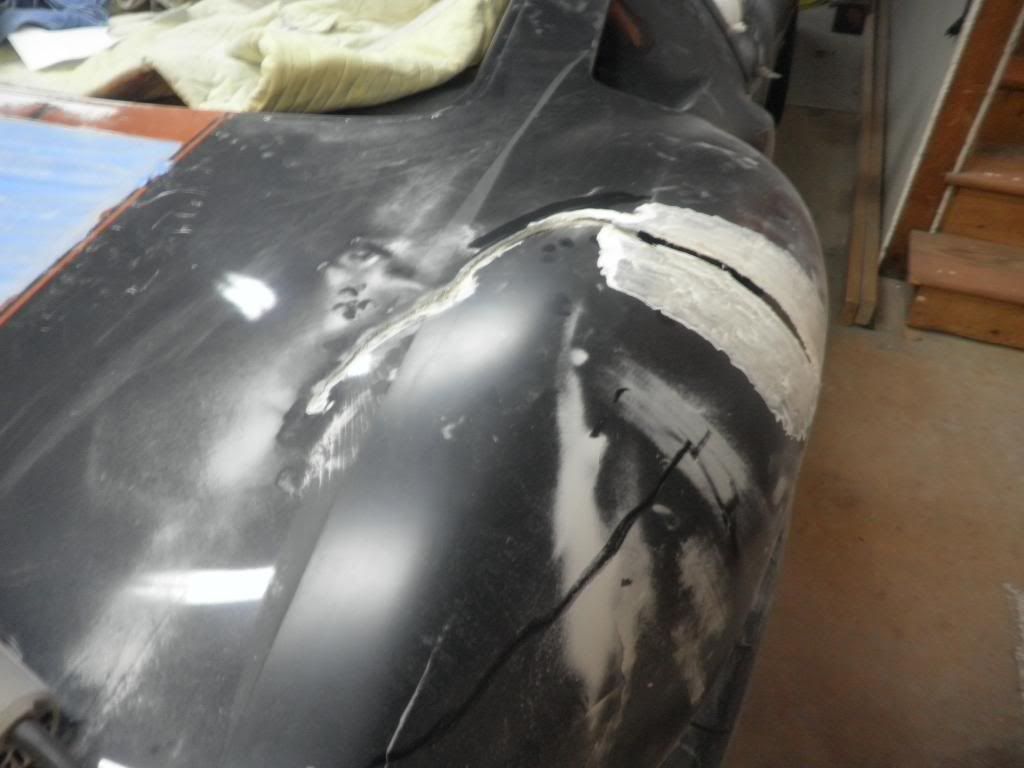
On this fender you can see the delamination of the underlying fiberglass. this was along the line of the bonding of the vertical support.
This revealed more problems. The shop that added the gulf flares, evidently had to flex one of the flares to get it to fit. It now stuck higher than its counterpart and a jig had to be made to pull it back in line, and line up the outside edge of the fender.
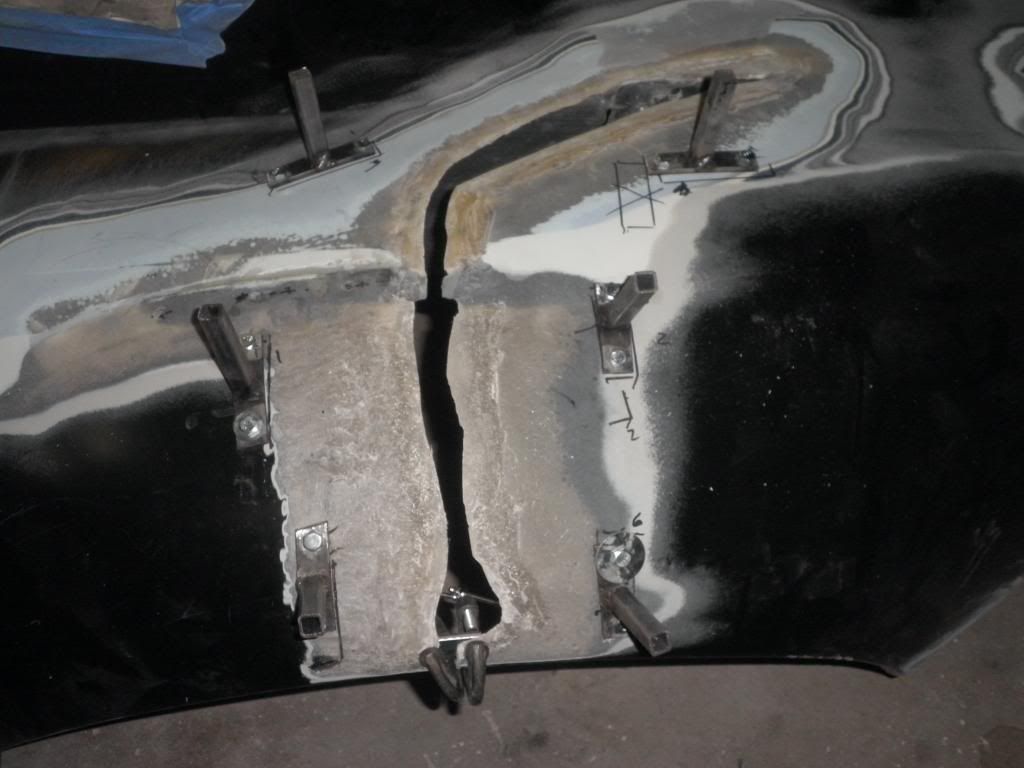
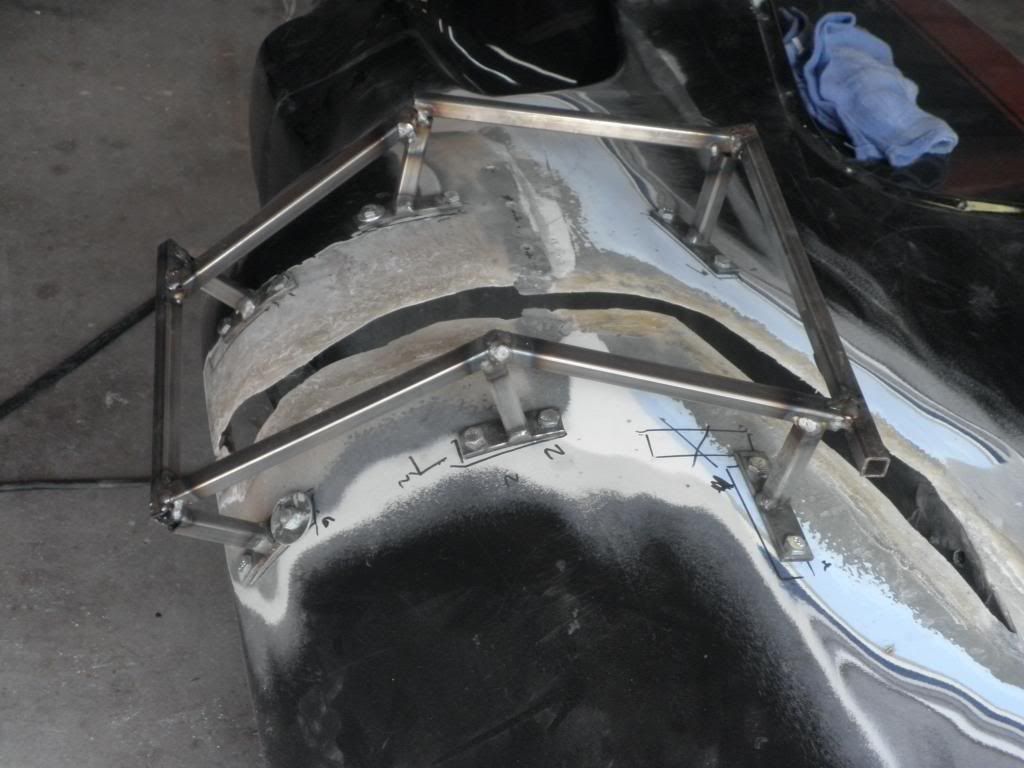
Once this was lined up the vertical supports had to be repaired so that everything else would line up. All the old bonding agent was removed, a set of straps were then added to hold the vertical element in alignment, and West Marine Six-10 bonding agent was applied. A bar clamp and wood block was used to pull everything together.
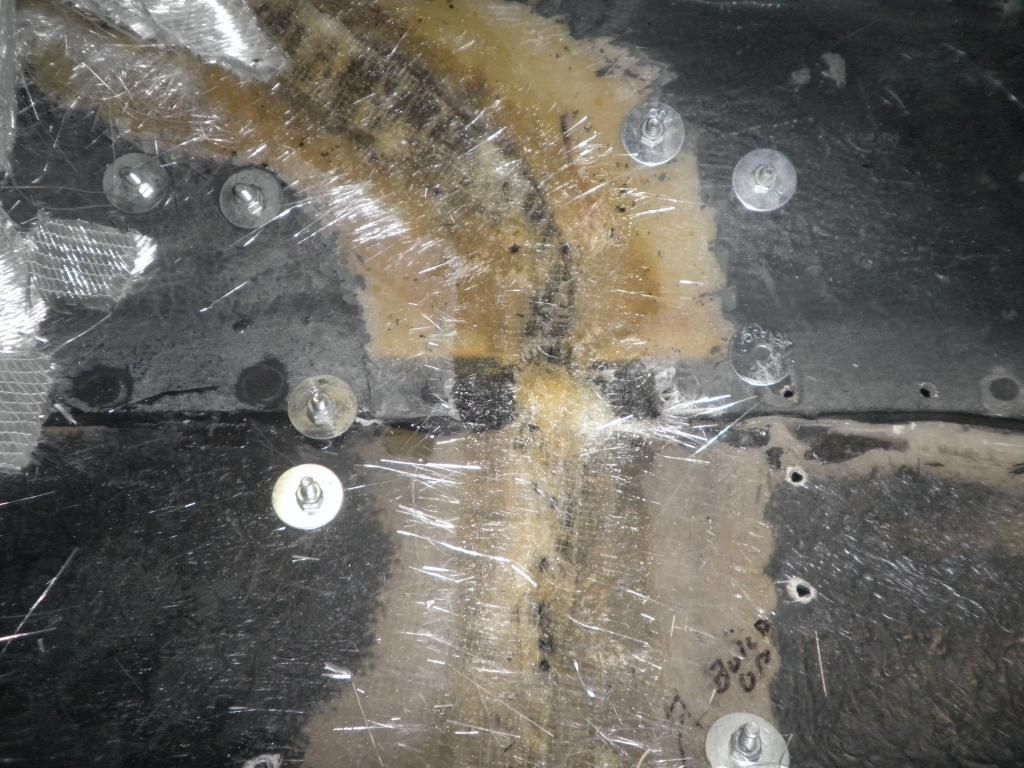
Following that, the vertical support was repaired with several layers of fiberglass.

The bonding line for the gulf flare was rebonded and then the repair of the fenders was undertaken using "several" layers of fiberglass including Biaxial fiberglass for streenght.
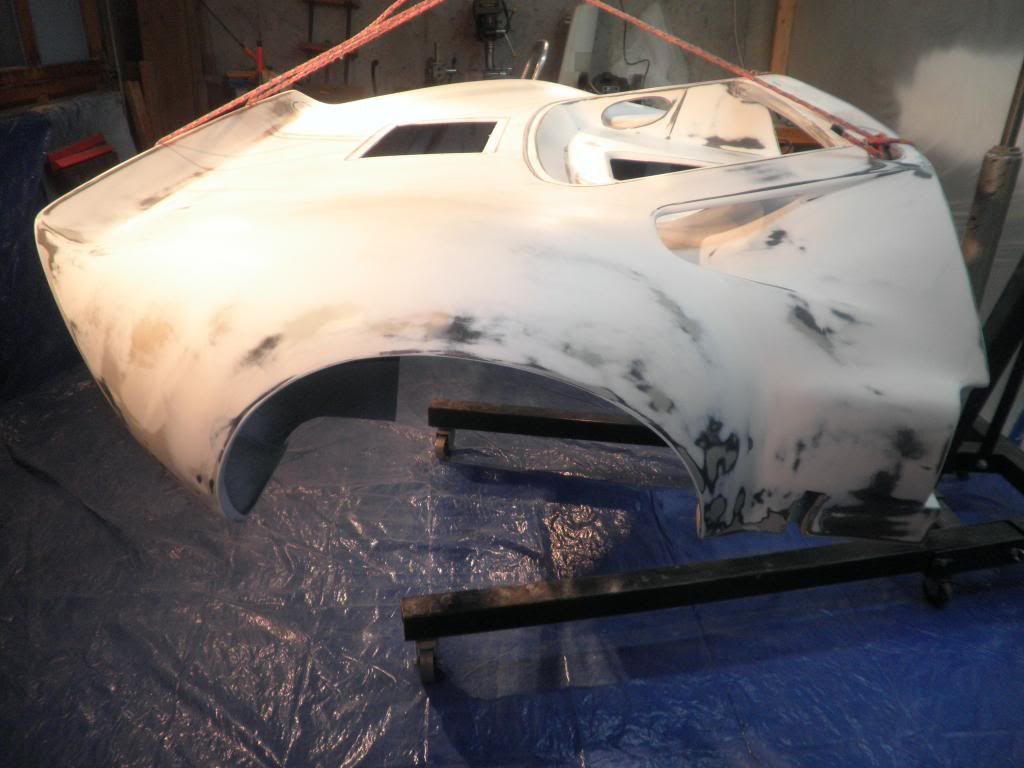
After much sanding, filing, and filling the fender began to take shape. Several fractures in the filler on the lower sides of the fender were discovered and were dug out and refilled. Several stress fractures in the paint were found and they too were ground out ad filled. Then the job I hated the most to do was next. Sanding.
I first thought I would be able to preserve the stripes, but due to so many coats of paint it wasn't possible to save them, so all was sanded. There was an area where the heat of the exhaust had bubbled the paint under the rear glass area, so it all had to come off anyway. Now came the hard decision.
A repaint would cost a fortune. The original paint 8-10 years ago cost aver $6K. So today it would be higher. I could get it painted, but it would stress the finances. We had an emergency fund before the scare. It has a big hole in it now. I also developed an inguinal hernia that had to be fixed. I can tell you that if you don't have an emergency fund for things such as these, you are in for a bad time financially. Mine is = to 1 years salary. There is still some money in there and I could use it but I don't like the idea of it being lower than it needs to be.
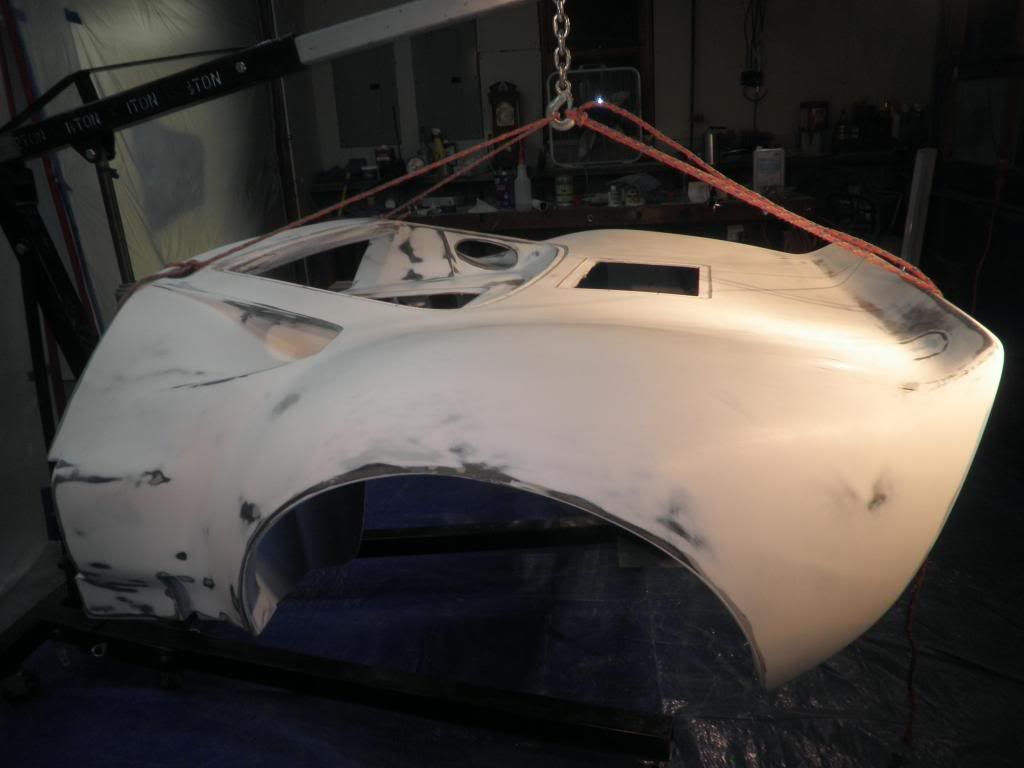
I had already ordered the 2K primer so it was applied. I decided to go with an alternative that I had thought of several months before. Plastidip. Since I was going in this direction, I would do a little experimenting. I tried(key word) to duplicate the Linden green color to see how it would look on a Mk I full body. Came close but not close enough for me. So after several days of experimenting decided to go with a lighter shade of grey. The color on my car now is actually a dark shadow grey(Ford color) that we took out the red tones. It has darkened over the 10 years and is darker than I like. I ordered an Anthracite grey from Plastidip, which is one of their "metalizers"(sort of a metal flake). There is one problem with ordering their rubber based paints. You can't return it. It turned out that after I bought it there was a Youtube video of a car done with it. It was darker than I thought. So more experimenting(after adding an industrial white pigment) I found a grey I liked. I plan to add some clear coat(Plastidip) to give it a little shine and add some stripes as well. Here it is in primer and block sanded.
Here it is in its present state.

http://i282.photobucket.com/albums/kk242/Billmusarra/Rear%20Clip%20repair/P2090295_zpsc5bff7e2.jpg
This is good for at least 6 months and probably for a year since it will see the elements only when it is clear. I have about 4-5 coats on the rear clip and that was less than a gallon. The sprayer cost $80 and the paint $57 a gallon, the clear is about $60. I have a second gallon of the Anthracite so it should cover the rest of the car. For under $250 not bad. Had I waited til after the video, I could have held it down to under $200. The stripe will be done with regular paint from Duplicolor and should run about $20. This isn't a show finish but it will do til next year.
Bill
From the "folding" of the rear clip I knew that the the vertical supports to the fenders were broken as well. Further examination showed areas of delaminations in the upper portion of the rear clip.
These were dug out and fresh resin applied along with filler.
Having just gone through two scares of cancer, one with my wife and one for me(mine was negative hers wasn't, but is all clear now) I knew I could not afford to have the repairs made, or purchase a new rear clip. So I took on the challenge and decided to do the work myself. It is amazing what you can learn when you need/have to(thank you Youtube) [ame=http://www.youtube.com/watch?v=yoURRmkD8MY&list=TL1nfjNHGxHeA6Z1Jlk-qzKOi1xIxyz993]There's A Hole In My Boat~ Gelcoat Color Matching (Part 1) - YouTube[/ame]. I investigated the fractures further and found that the bonding to the vertical uprights were broken and the bonding of the gulf flares on one fender was broken as well. The flares were added when the tires were sticking outside of the fenders.
The first order of business was to cut away the fractured fiberglass.
On this fender you can see the delamination of the underlying fiberglass. this was along the line of the bonding of the vertical support.
This revealed more problems. The shop that added the gulf flares, evidently had to flex one of the flares to get it to fit. It now stuck higher than its counterpart and a jig had to be made to pull it back in line, and line up the outside edge of the fender.
Once this was lined up the vertical supports had to be repaired so that everything else would line up. All the old bonding agent was removed, a set of straps were then added to hold the vertical element in alignment, and West Marine Six-10 bonding agent was applied. A bar clamp and wood block was used to pull everything together.
Following that, the vertical support was repaired with several layers of fiberglass.
The bonding line for the gulf flare was rebonded and then the repair of the fenders was undertaken using "several" layers of fiberglass including Biaxial fiberglass for streenght.
After much sanding, filing, and filling the fender began to take shape. Several fractures in the filler on the lower sides of the fender were discovered and were dug out and refilled. Several stress fractures in the paint were found and they too were ground out ad filled. Then the job I hated the most to do was next. Sanding.
I first thought I would be able to preserve the stripes, but due to so many coats of paint it wasn't possible to save them, so all was sanded. There was an area where the heat of the exhaust had bubbled the paint under the rear glass area, so it all had to come off anyway. Now came the hard decision.
A repaint would cost a fortune. The original paint 8-10 years ago cost aver $6K. So today it would be higher. I could get it painted, but it would stress the finances. We had an emergency fund before the scare. It has a big hole in it now. I also developed an inguinal hernia that had to be fixed. I can tell you that if you don't have an emergency fund for things such as these, you are in for a bad time financially. Mine is = to 1 years salary. There is still some money in there and I could use it but I don't like the idea of it being lower than it needs to be.
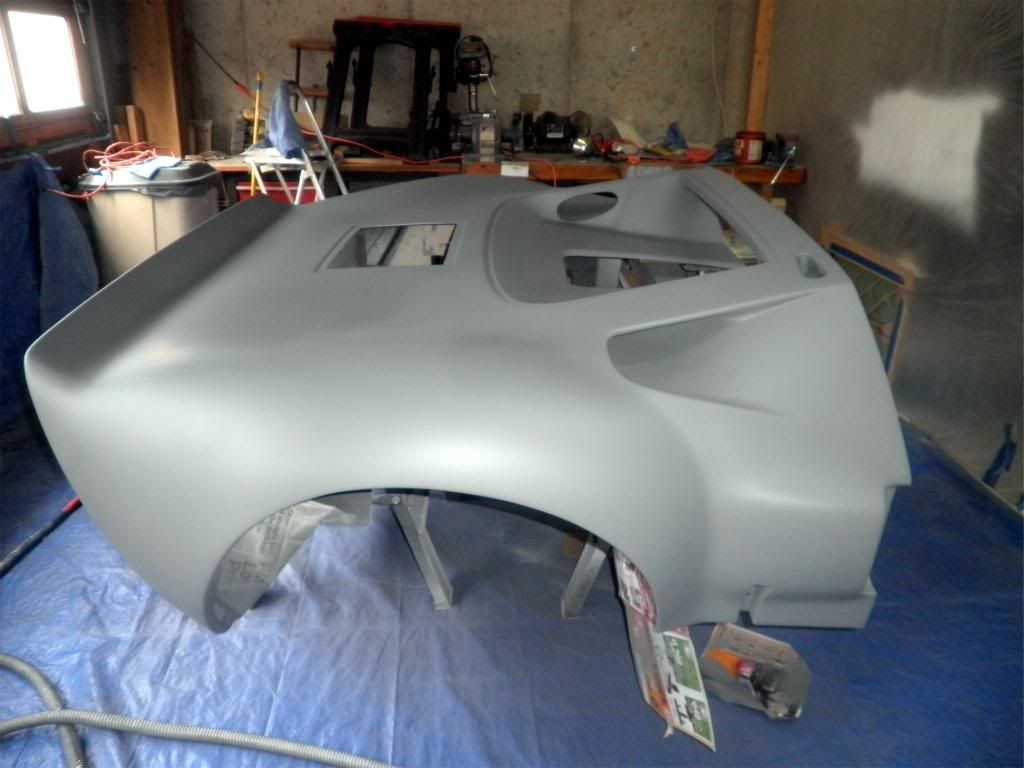
I had already ordered the 2K primer so it was applied. I decided to go with an alternative that I had thought of several months before. Plastidip. Since I was going in this direction, I would do a little experimenting. I tried(key word) to duplicate the Linden green color to see how it would look on a Mk I full body. Came close but not close enough for me. So after several days of experimenting decided to go with a lighter shade of grey. The color on my car now is actually a dark shadow grey(Ford color) that we took out the red tones. It has darkened over the 10 years and is darker than I like. I ordered an Anthracite grey from Plastidip, which is one of their "metalizers"(sort of a metal flake). There is one problem with ordering their rubber based paints. You can't return it. It turned out that after I bought it there was a Youtube video of a car done with it. It was darker than I thought. So more experimenting(after adding an industrial white pigment) I found a grey I liked. I plan to add some clear coat(Plastidip) to give it a little shine and add some stripes as well. Here it is in primer and block sanded.
Here it is in its present state.
http://i282.photobucket.com/albums/kk242/Billmusarra/Rear%20Clip%20repair/P2090295_zpsc5bff7e2.jpg
This is good for at least 6 months and probably for a year since it will see the elements only when it is clear. I have about 4-5 coats on the rear clip and that was less than a gallon. The sprayer cost $80 and the paint $57 a gallon, the clear is about $60. I have a second gallon of the Anthracite so it should cover the rest of the car. For under $250 not bad. Had I waited til after the video, I could have held it down to under $200. The stripe will be done with regular paint from Duplicolor and should run about $20. This isn't a show finish but it will do til next year.
Bill
Last edited:
")
")
